
Click here to see the product page
Kit Components:
- Intercooler
- Left and right mounting brackets
- Hood Latch support bracket
- Lower Bracket
- Various Nuts and bolts
Remove factory body components:
- Remove the front bumper cover from the vehicle.
- Remove the crash bar (main bumper)
- Remove the bracket that runs from the radiator support up to the hood latch. This will need to be removed to make room for the intercooler.
Make room for the intercooler
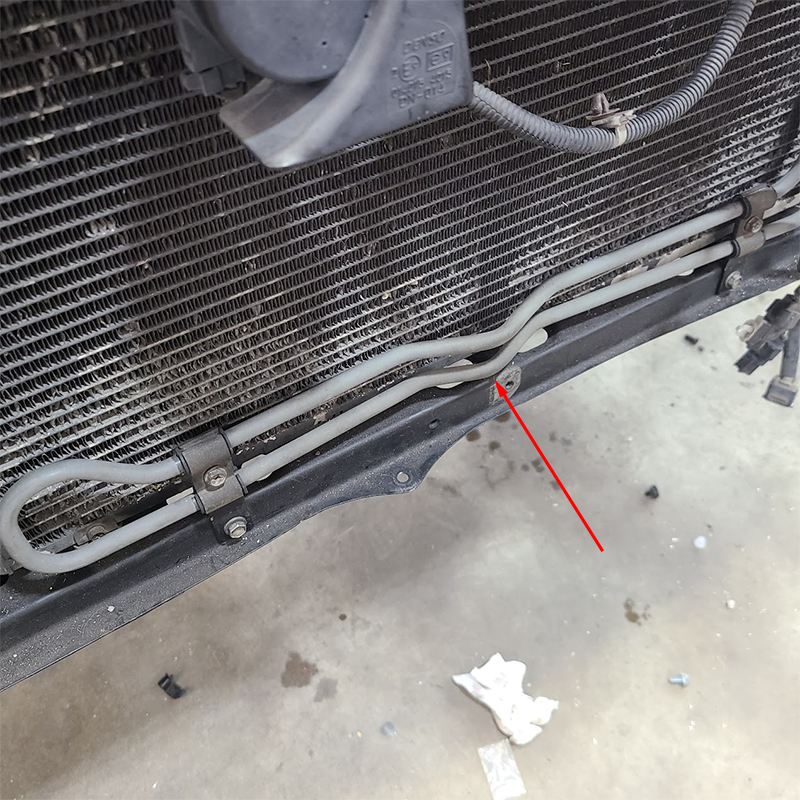
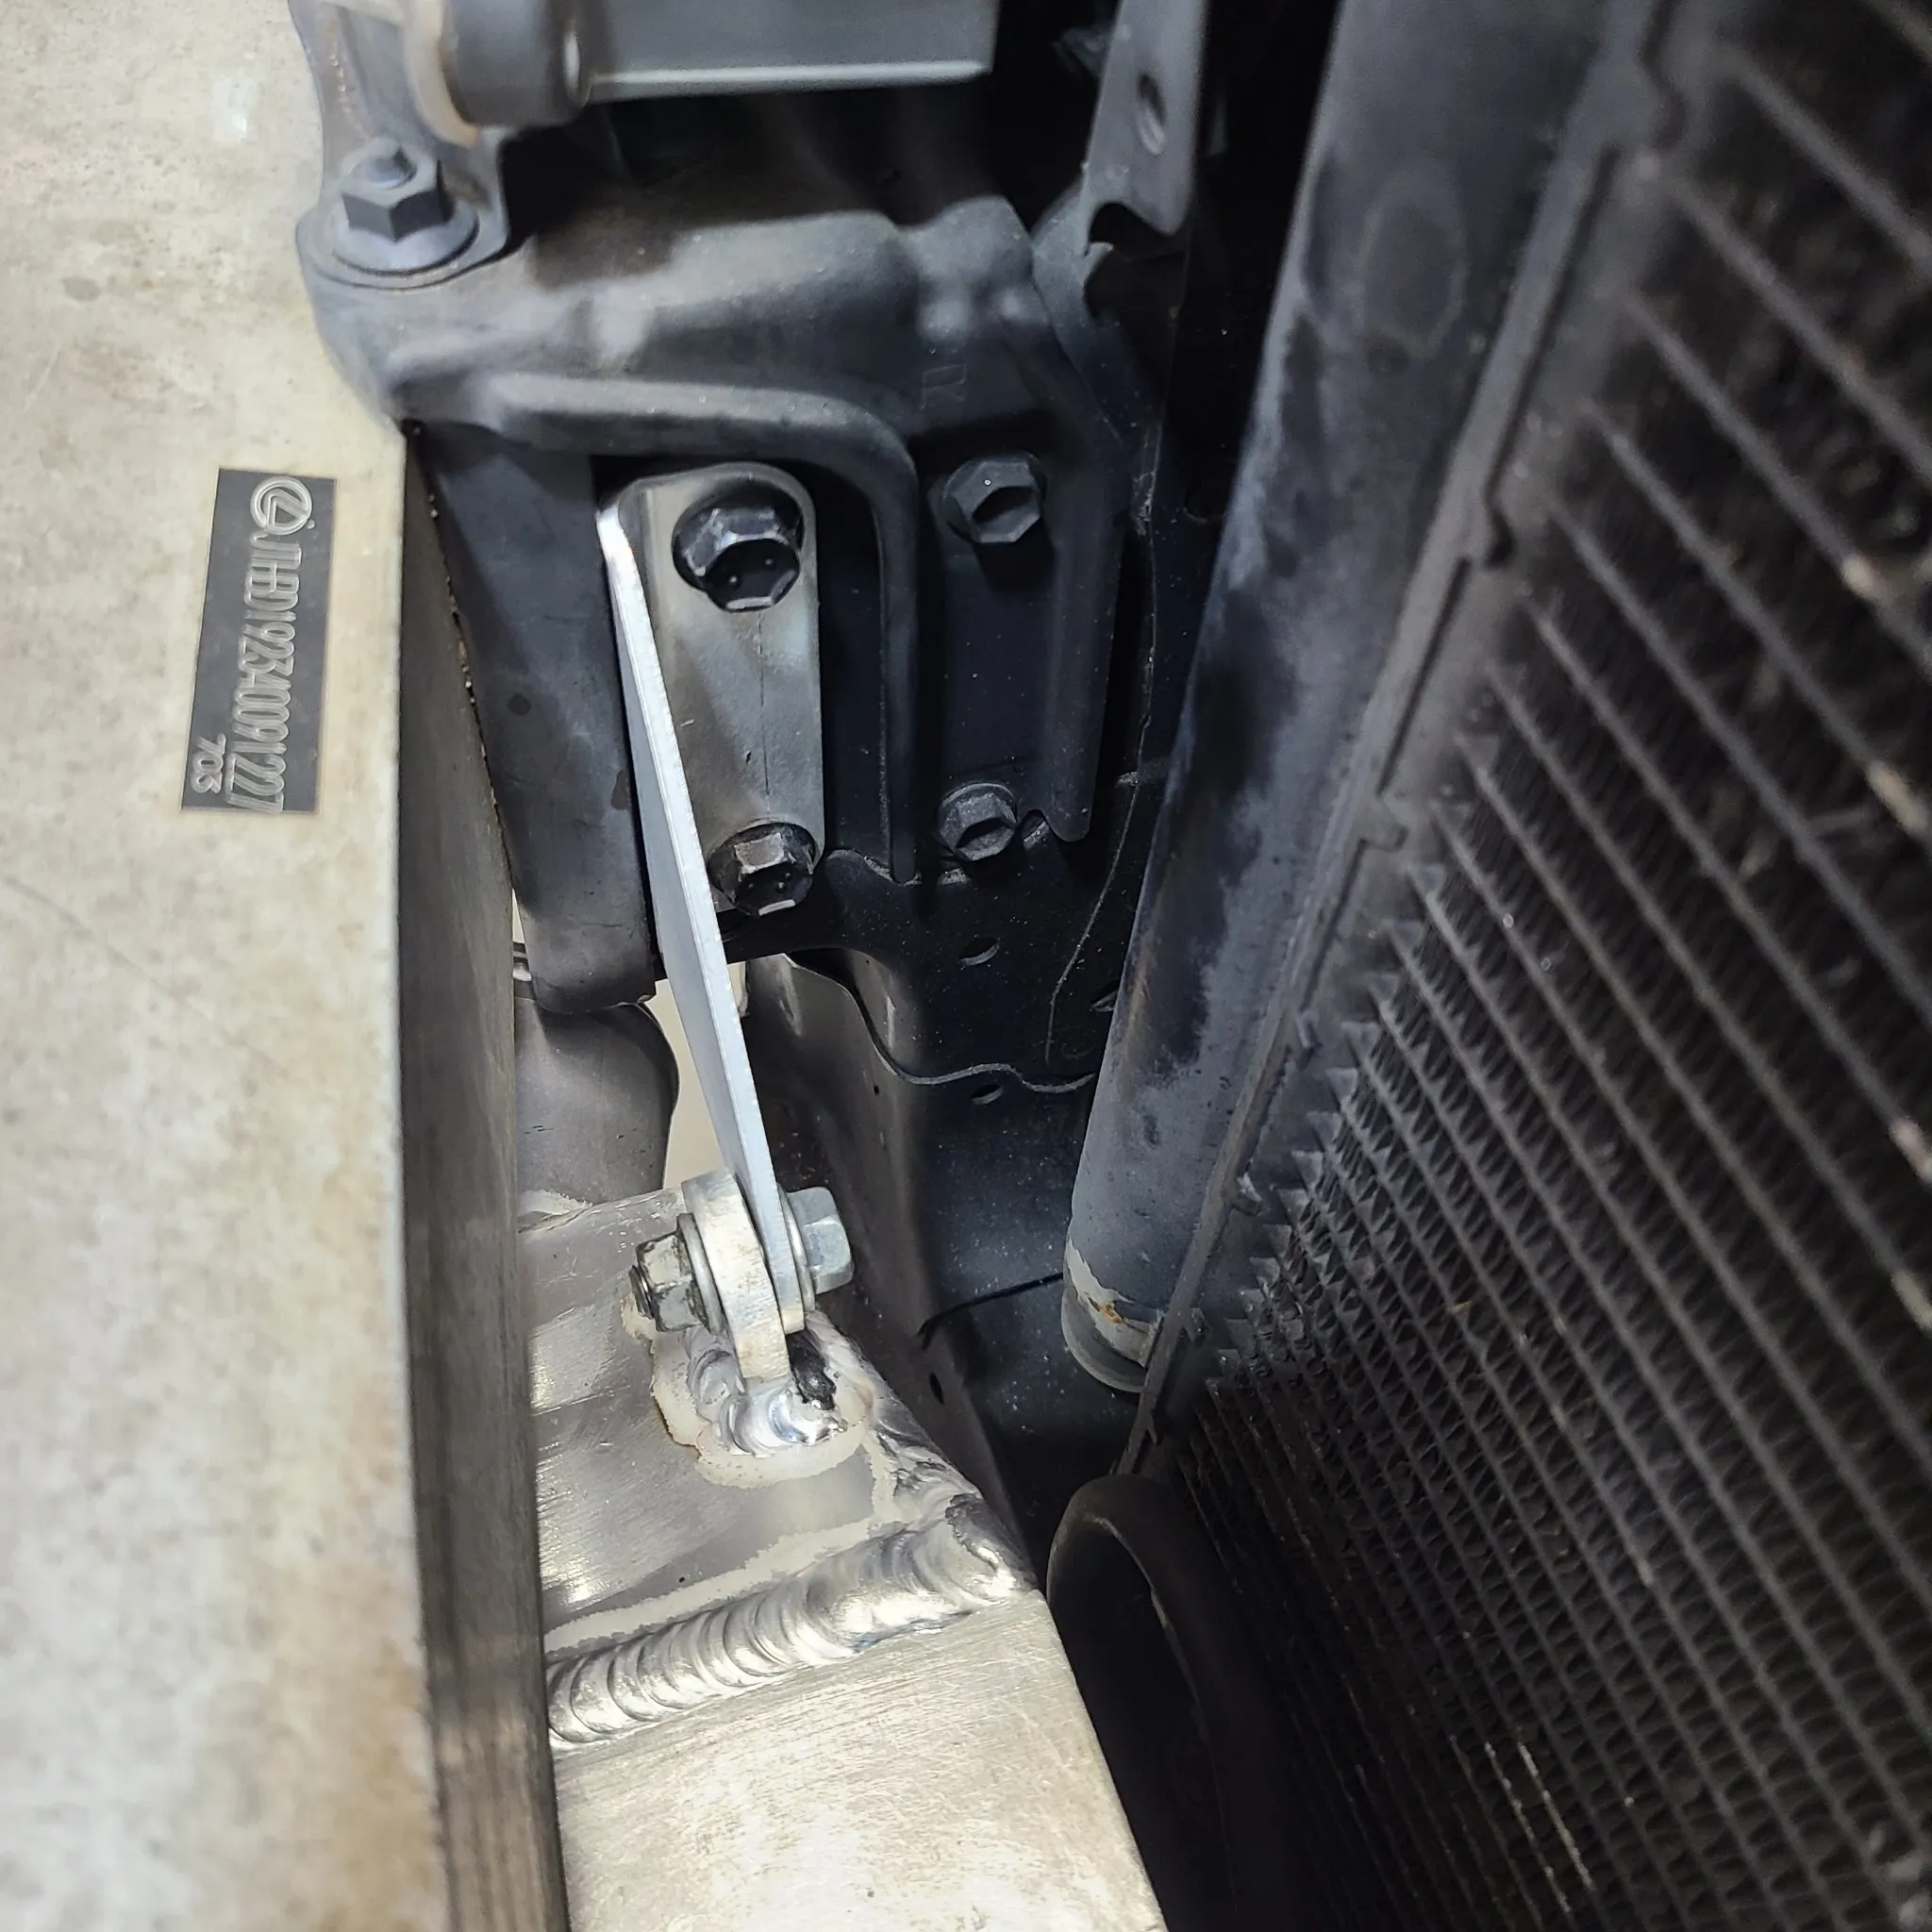
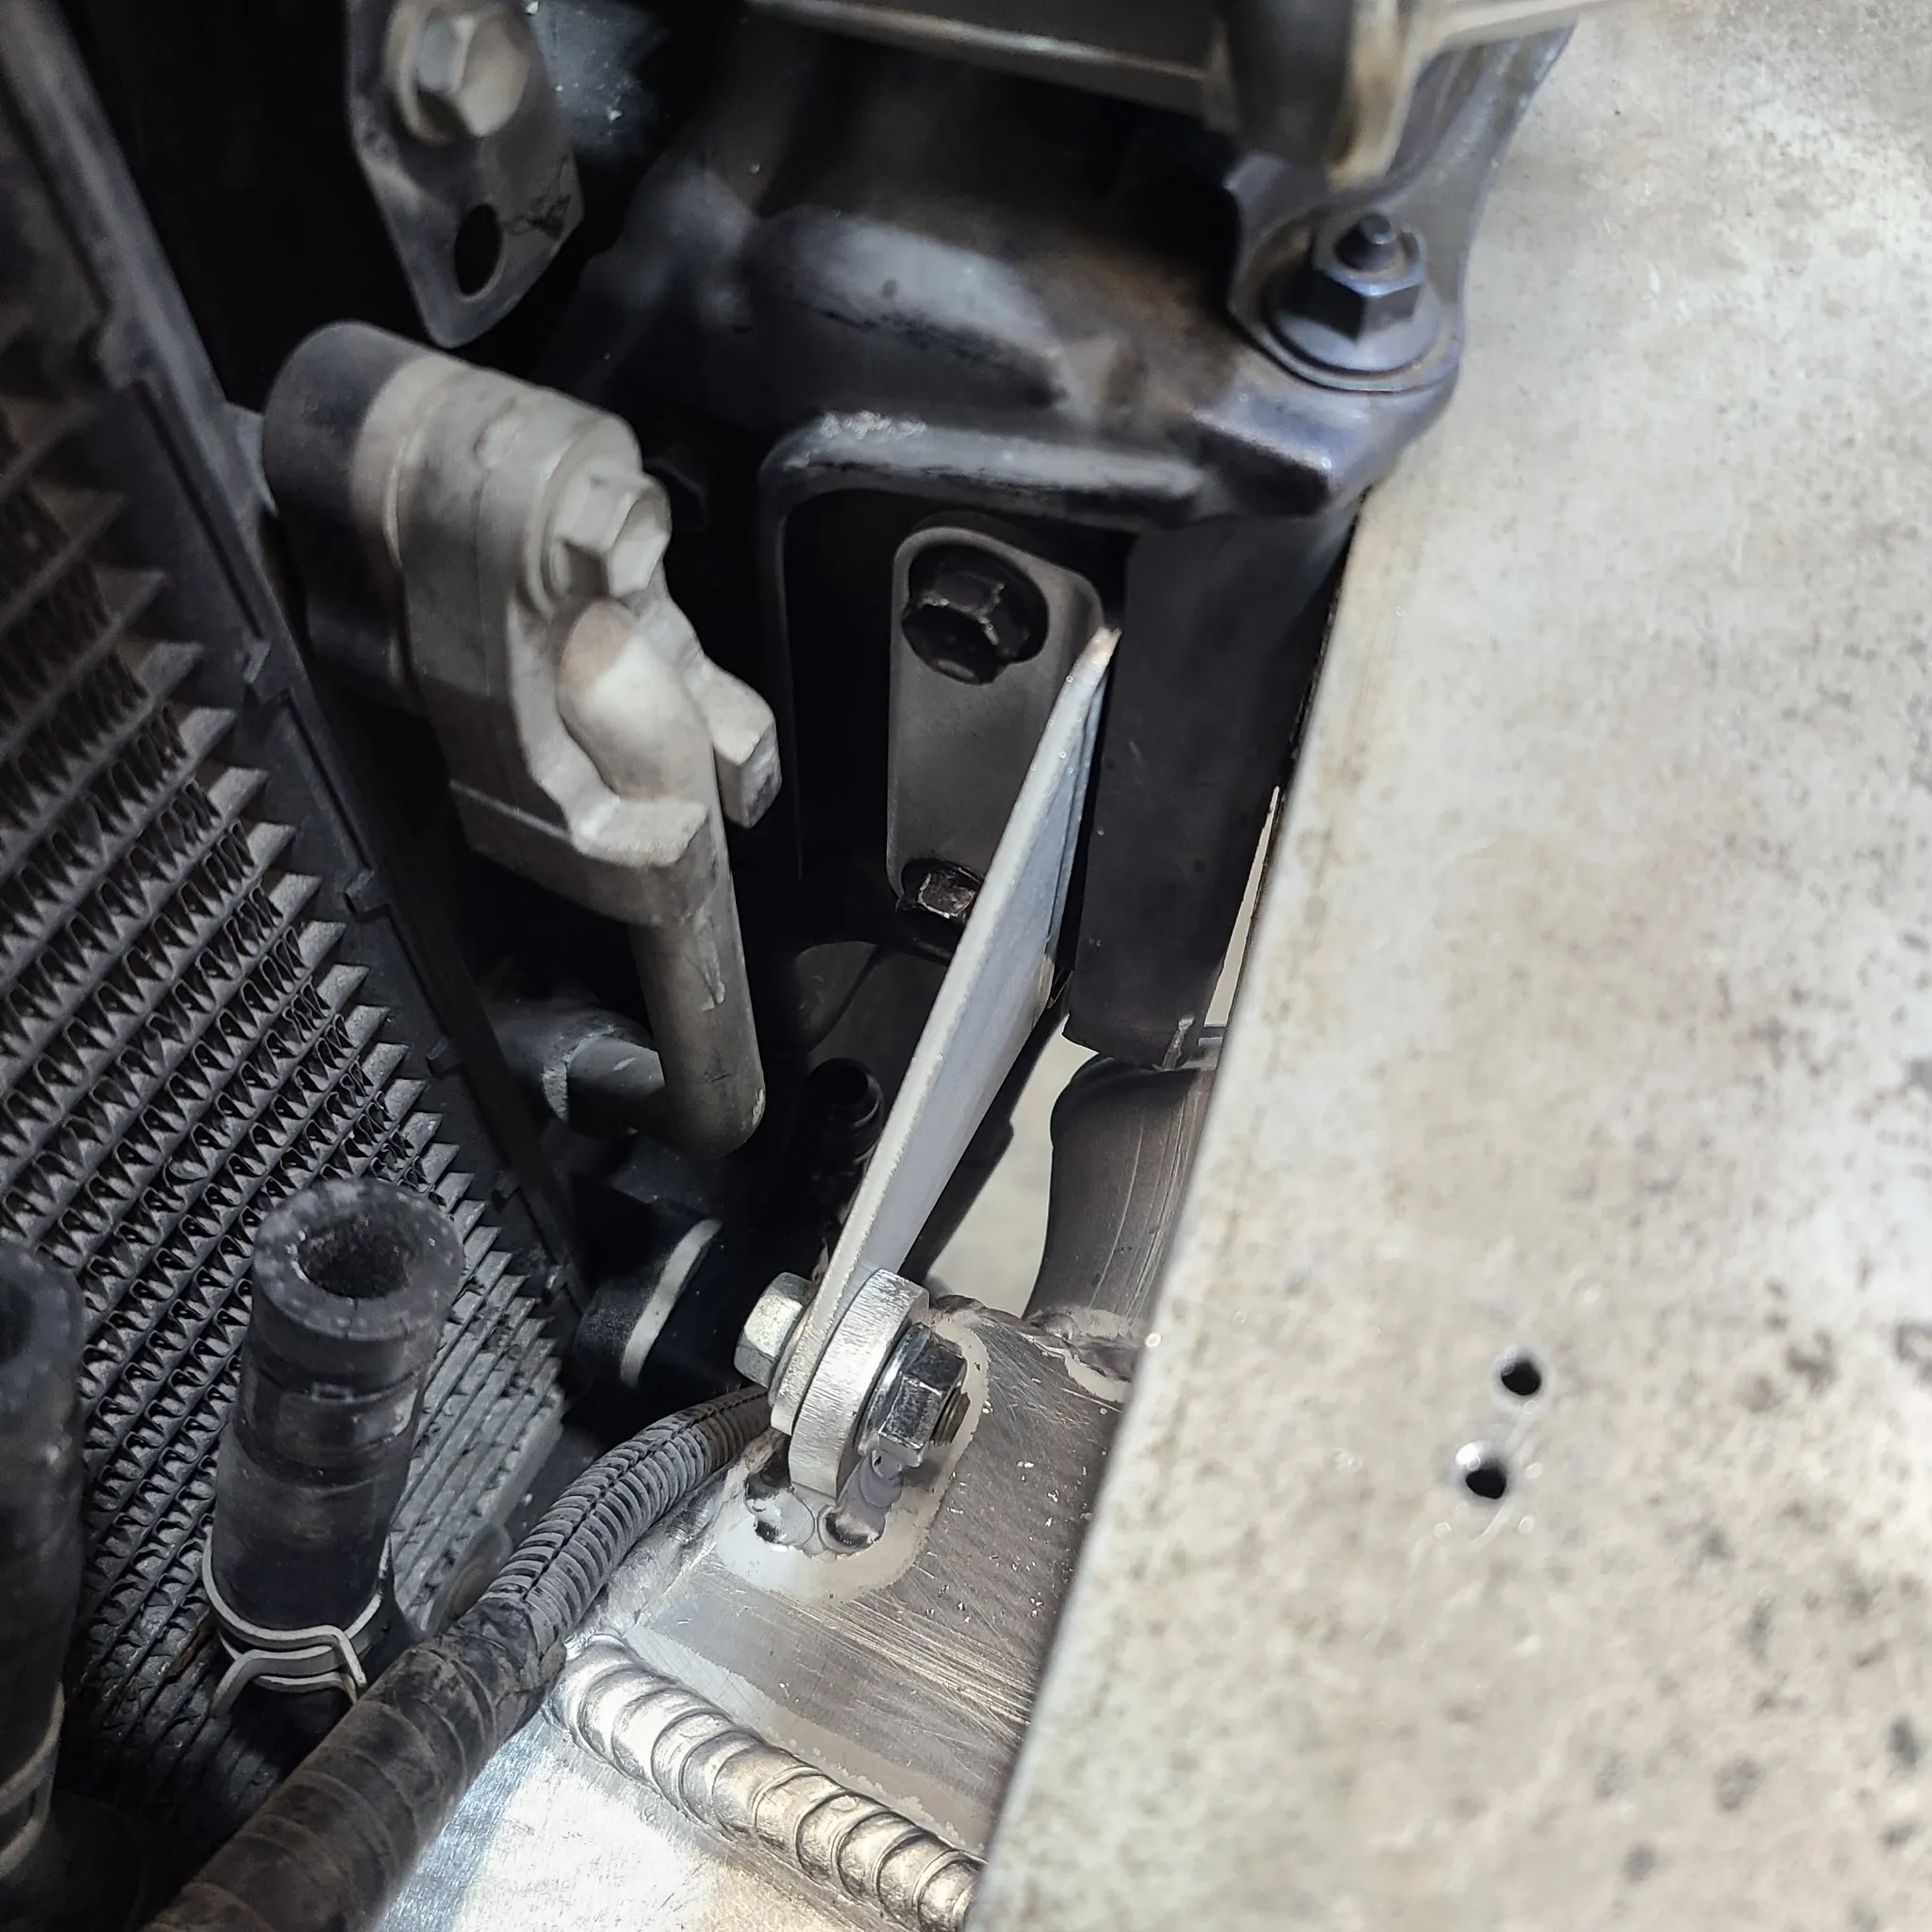
- The Power Steering Cooler: We need to push this back toward the AC condenser. You can do this by hand or with a rubber mallet. The specific area to focus on is where the red arrow is in the picture. Notice the bracket for the hood latch has been removed. The lines are bent around this bracket, but after removing we can now push them back and out of the way.
Turn the power steering cooler hose clamps
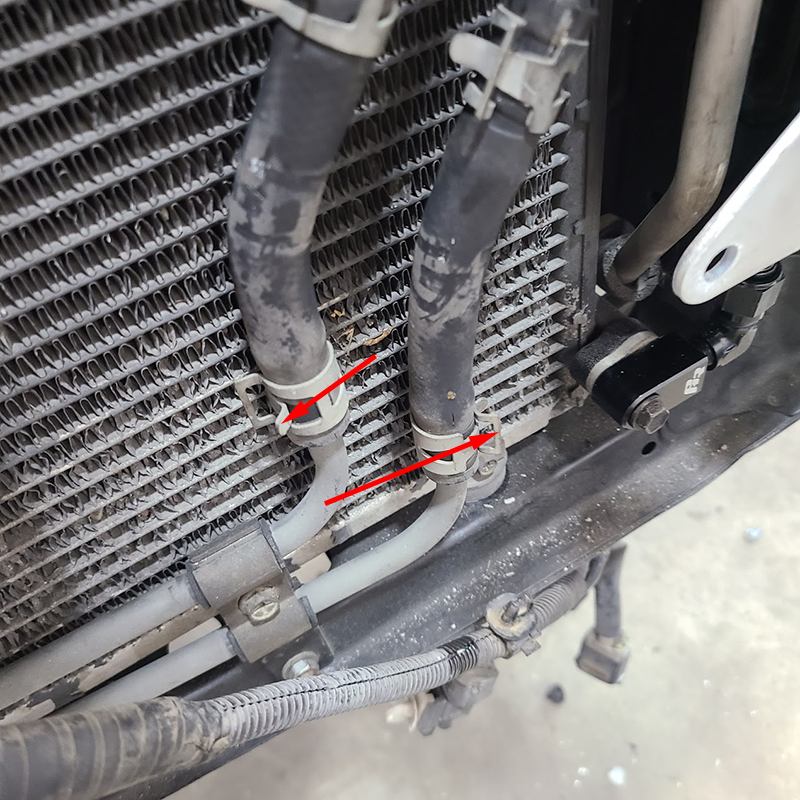
- The hose clamps on the hoses to the power steering cooler need to be turned so the tabs are to the side and not sticking straight forward.
Address the AC line
- The AC line that goes into the AC condenser sticks straight forward and into the area we need for the front mount intercooler. In the past, we have had to evacuate the AC system and remove the high side line, cut and weld it in a different orientation so that is doesn't stick out. PHR has addressed and simplified this problem with the PHR High Side Line Kit for IS300.
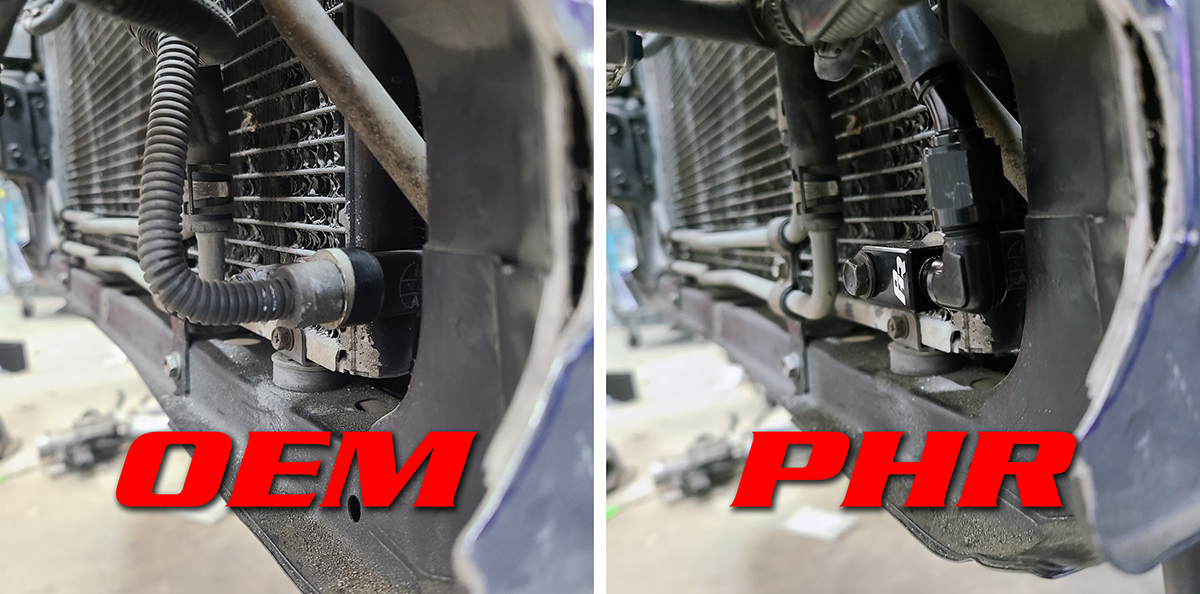

- This kit is not included as part of the intercooler kit, and must be purchased separately. But we are going to continue these instruction with the assumption that you have purchased this kit and will be using it to help you install the front mount.
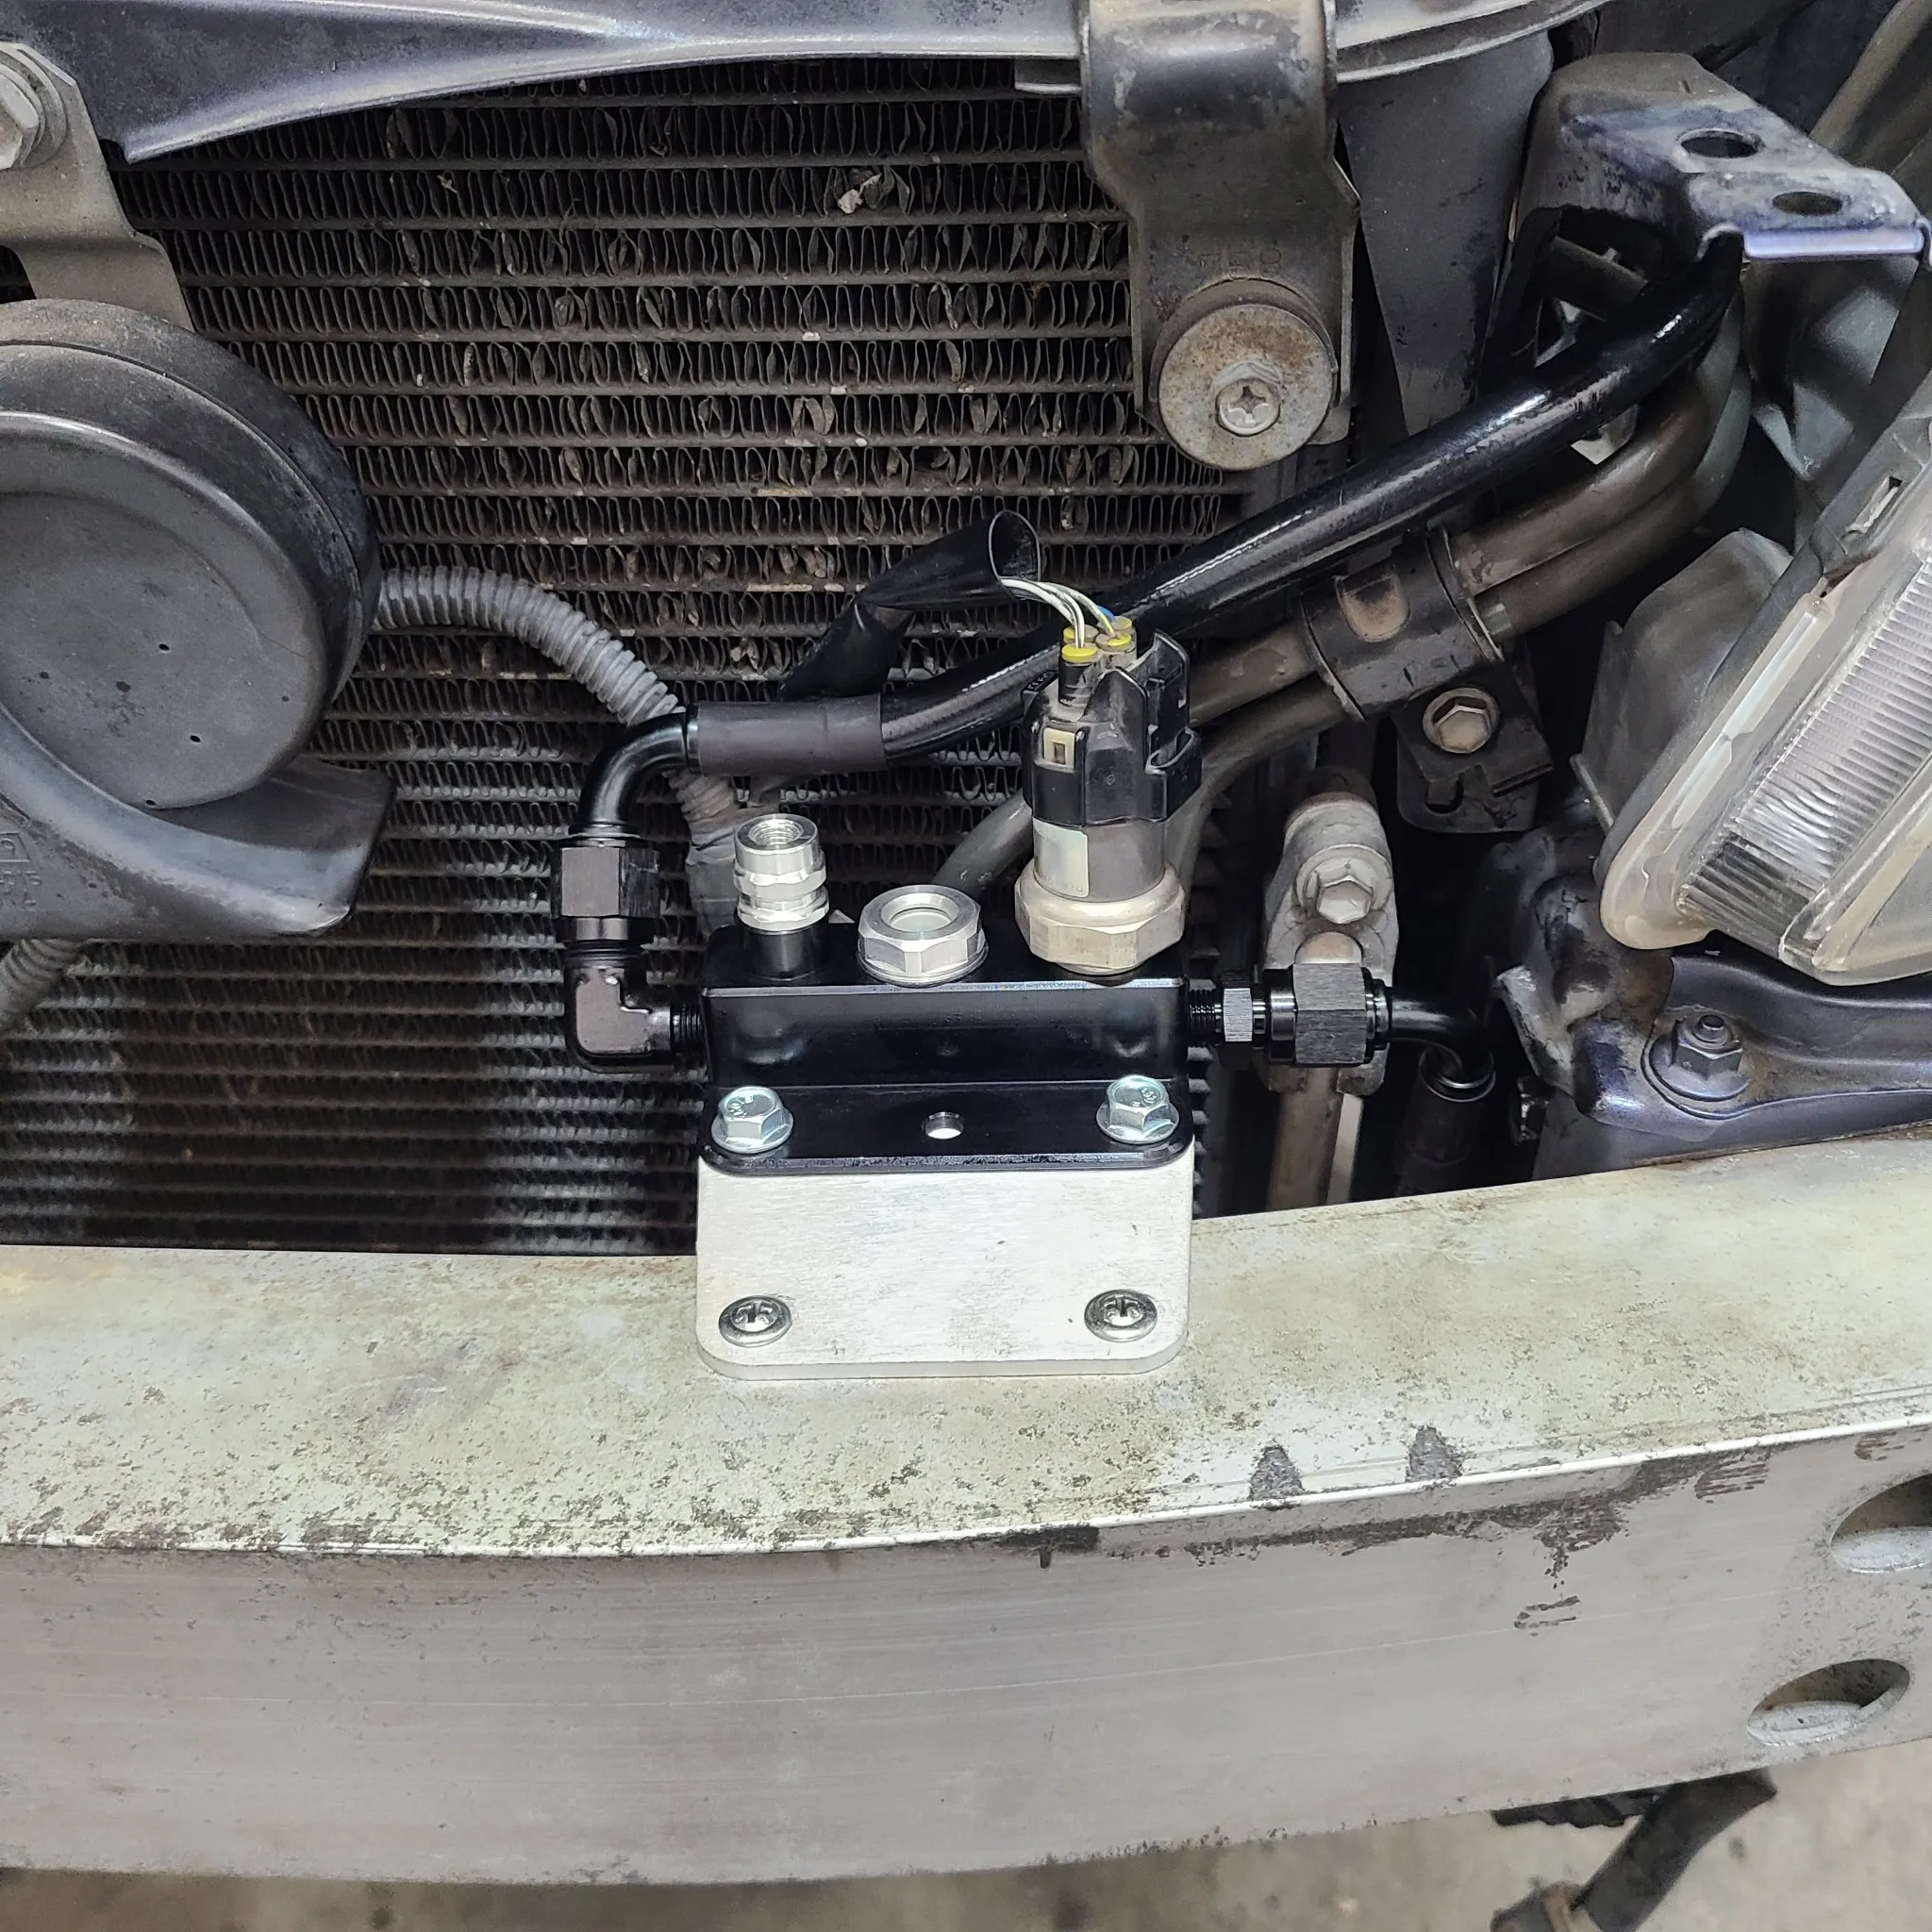
Install the right and left upper mounting brackets and AC Condenser Fitting
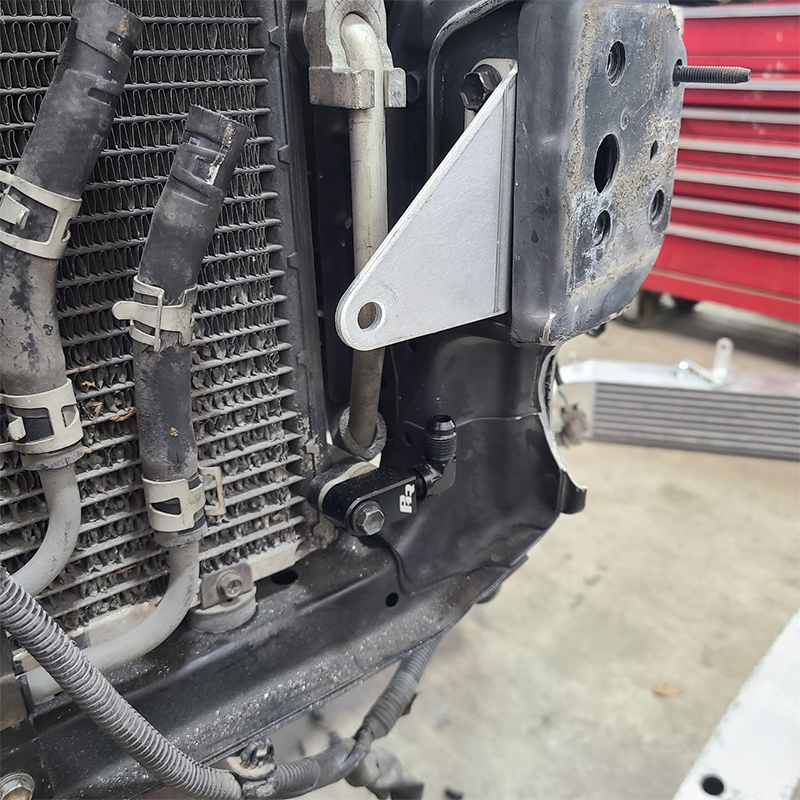
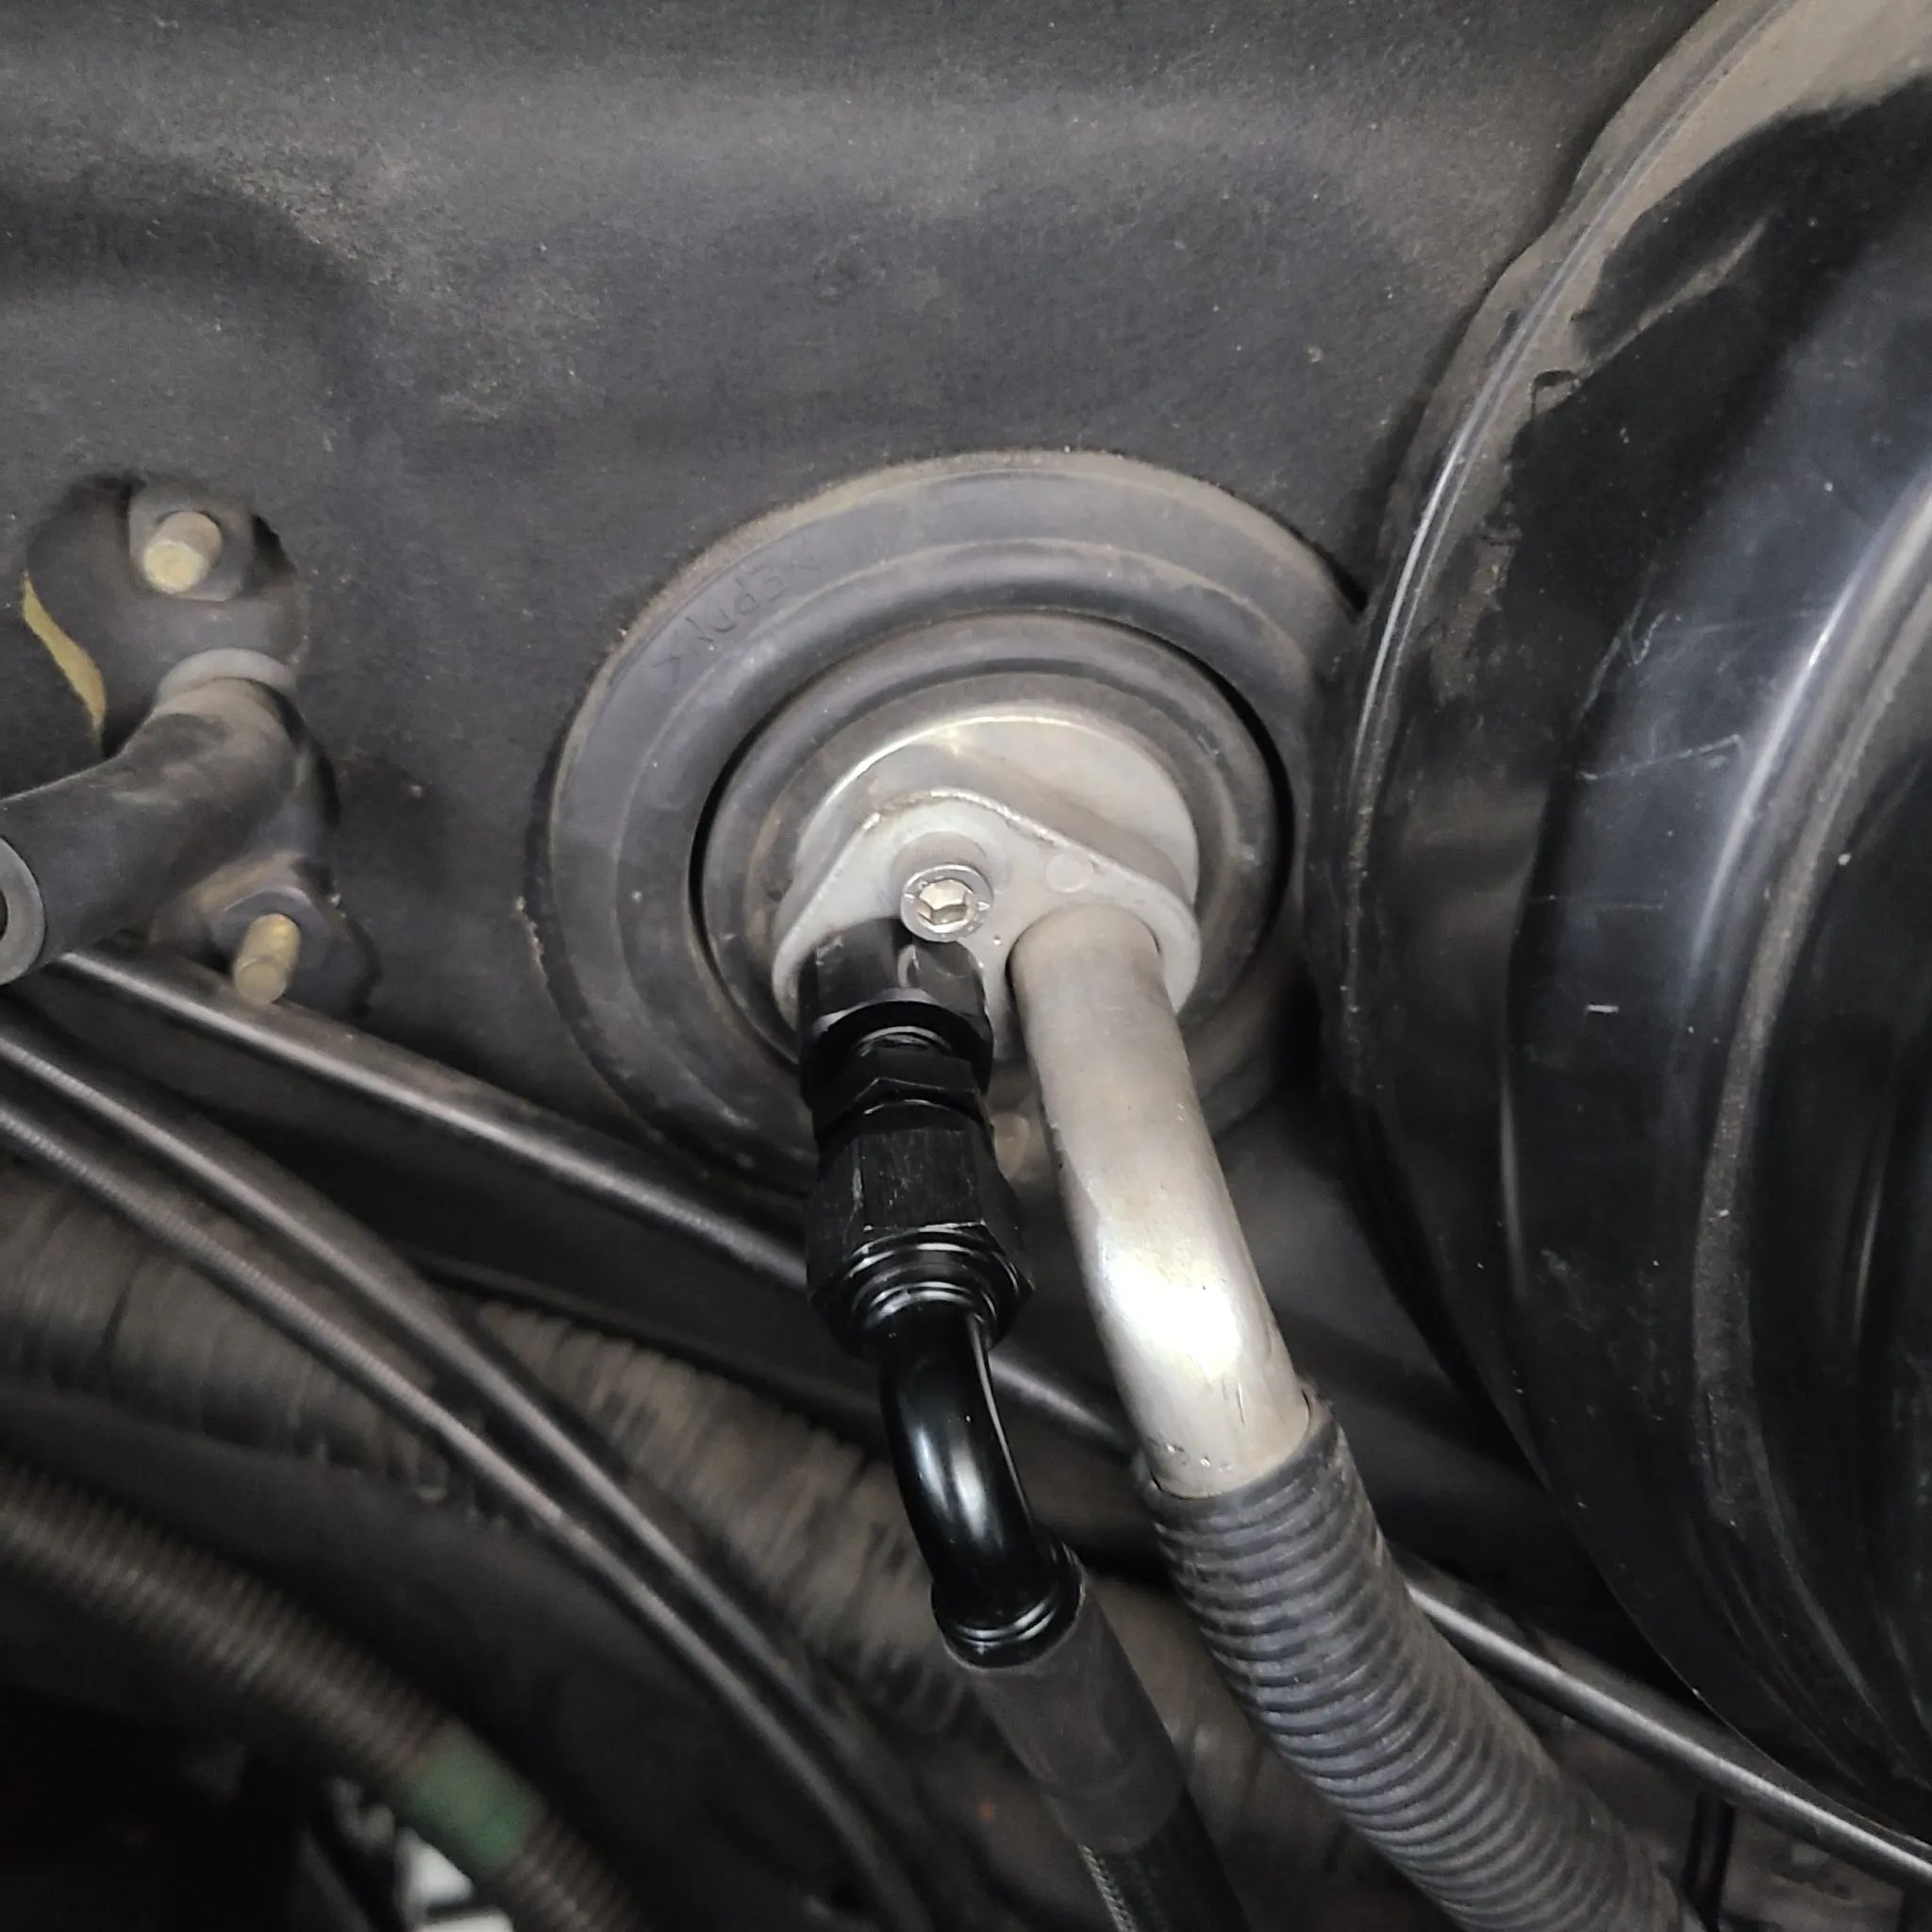
- Bolt the right bracket in place using the bolts that attach the crash bar bracket to the frame. Also in this picture, you can see PHR AC condenser fitting place. The 90 Degree AN Fitting should be sealed to the condenser fitting using a thread sealant (Don't use a thread locker! We use loctite #545 for best results). The AN fitting should be pointing straight up.
- The left bracket will install mirror to the right bracket on the opposite frame rail.
Put shorter A/C line in place.

- Install the hose. The 90 degree fitting at the top should be pointing perpendicular the the vehicle. You can tighten the line nut to the fitting. Just make sure the top remains in the proper orientation.
Reinstall the crash bar

- Here you can see the left side bracket as well as the crash bar reinstalled
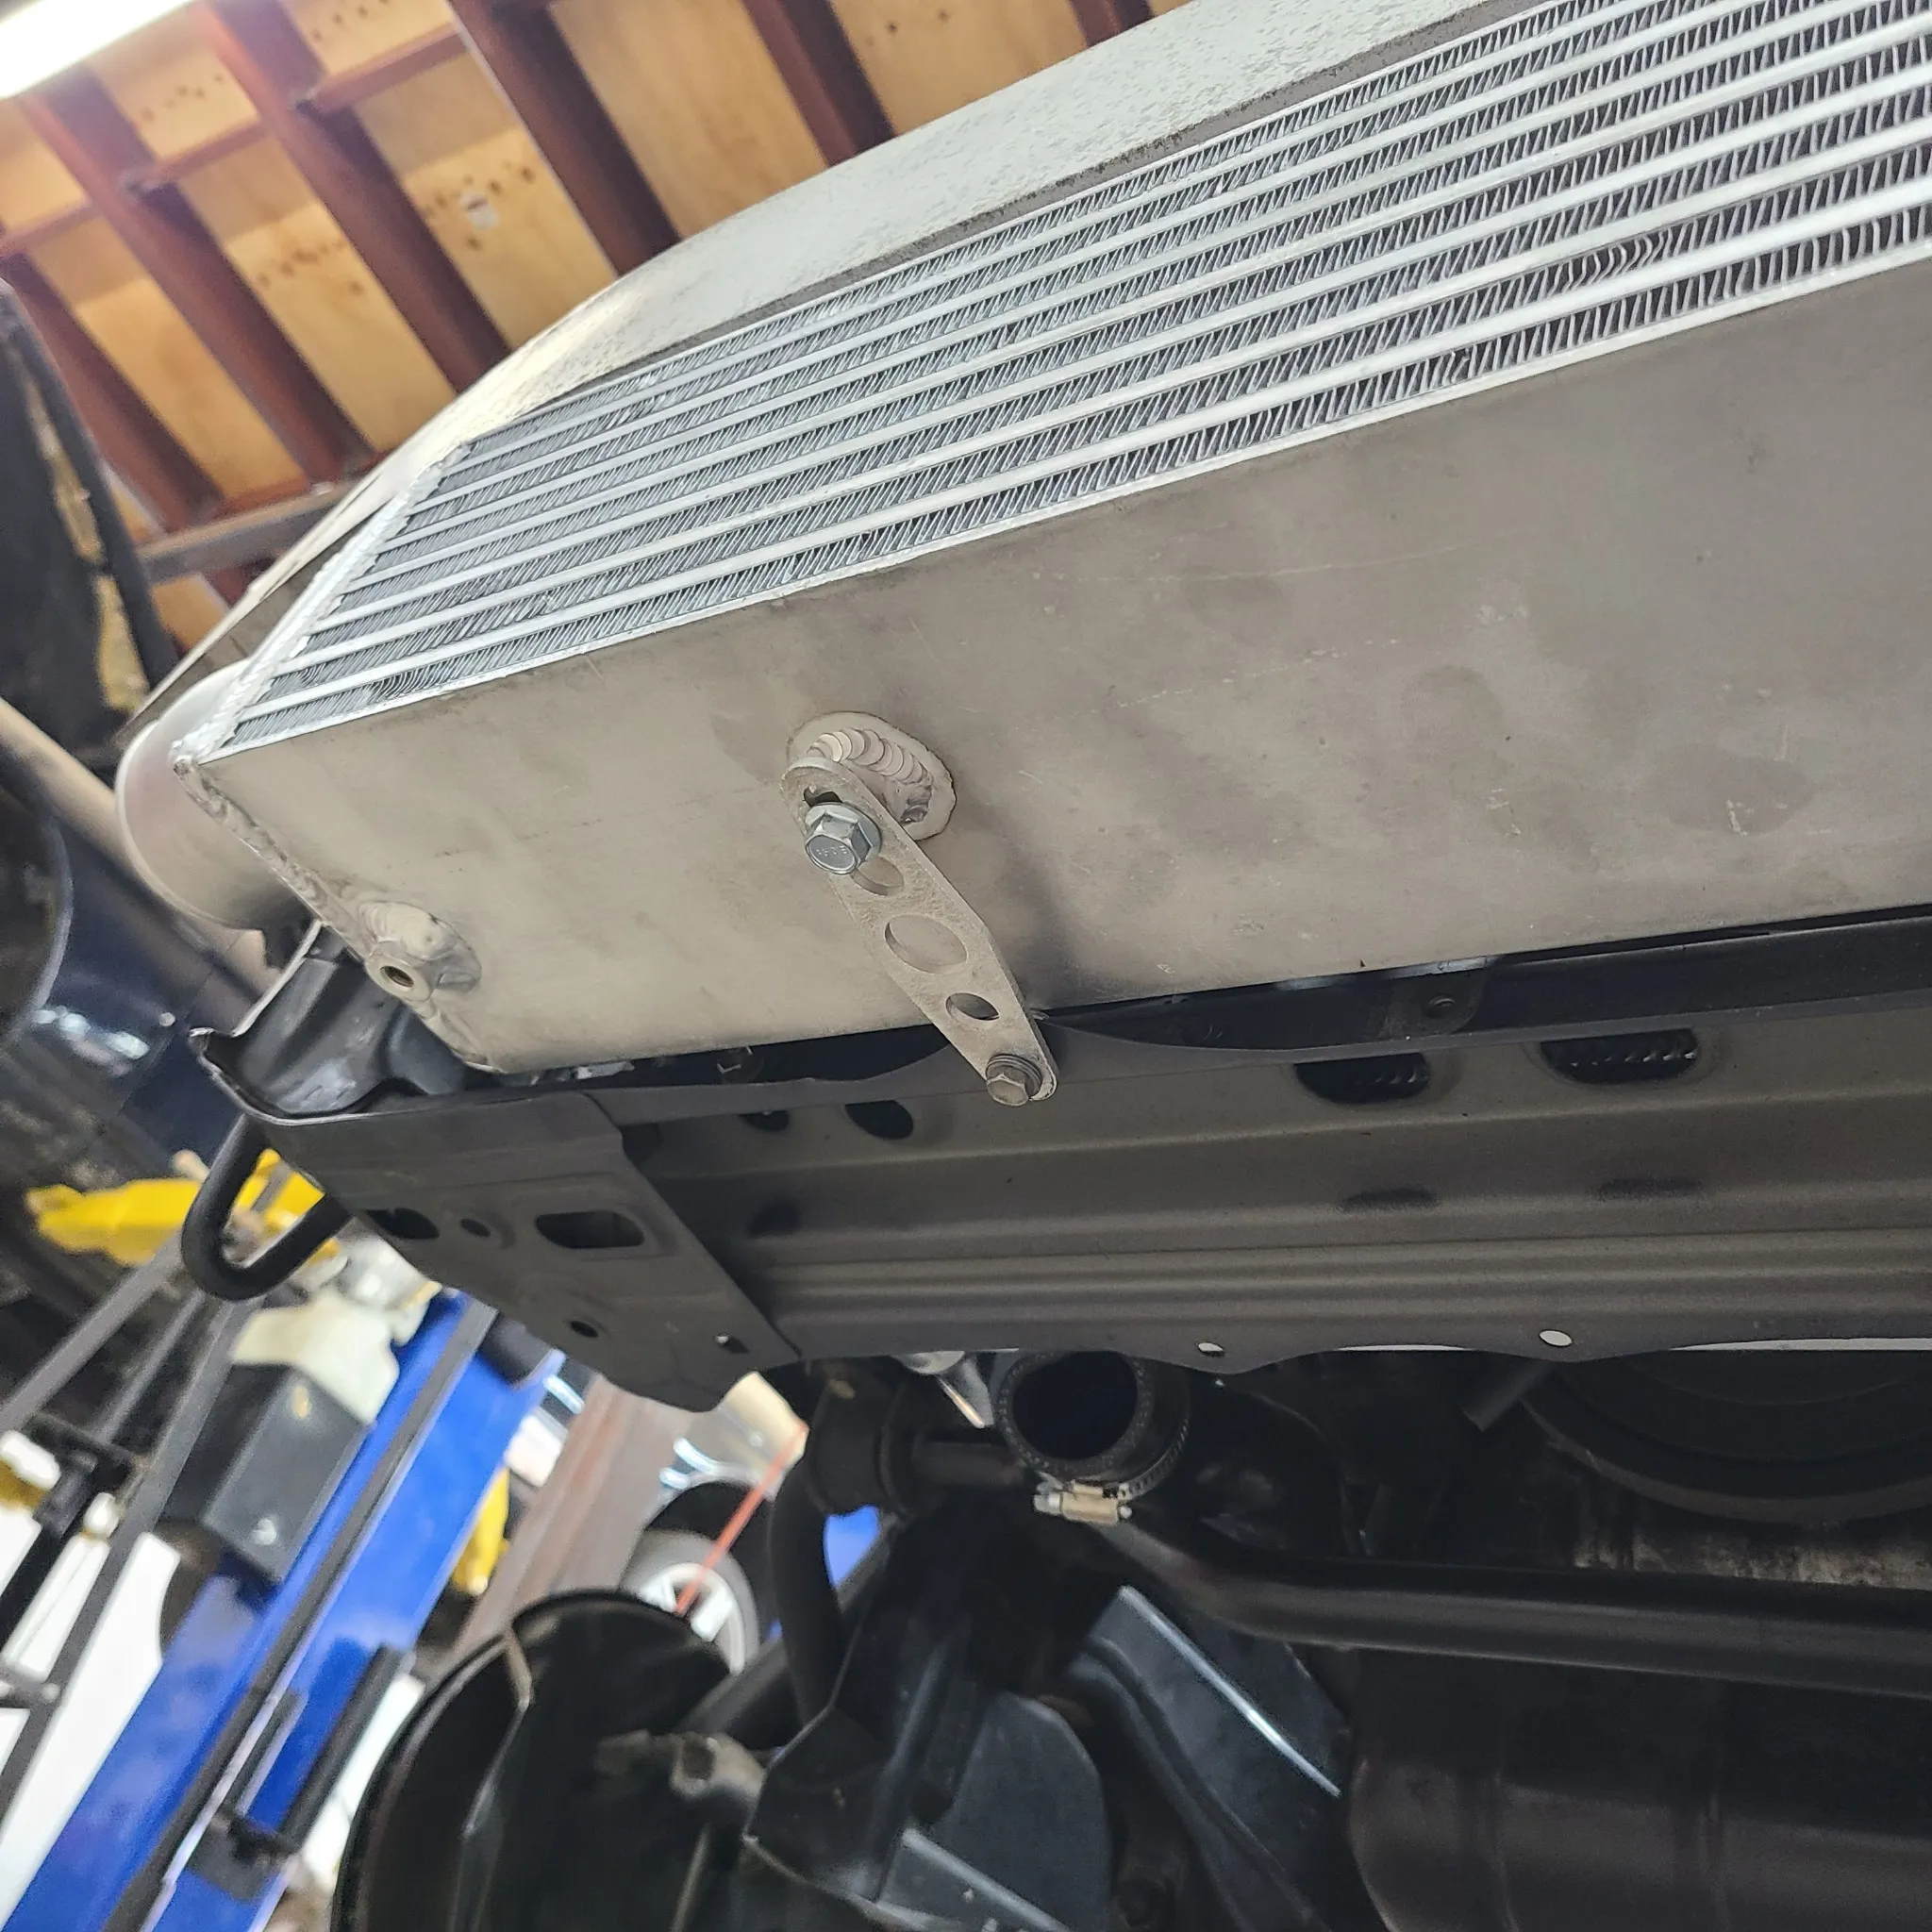
Trim the frame for clearance
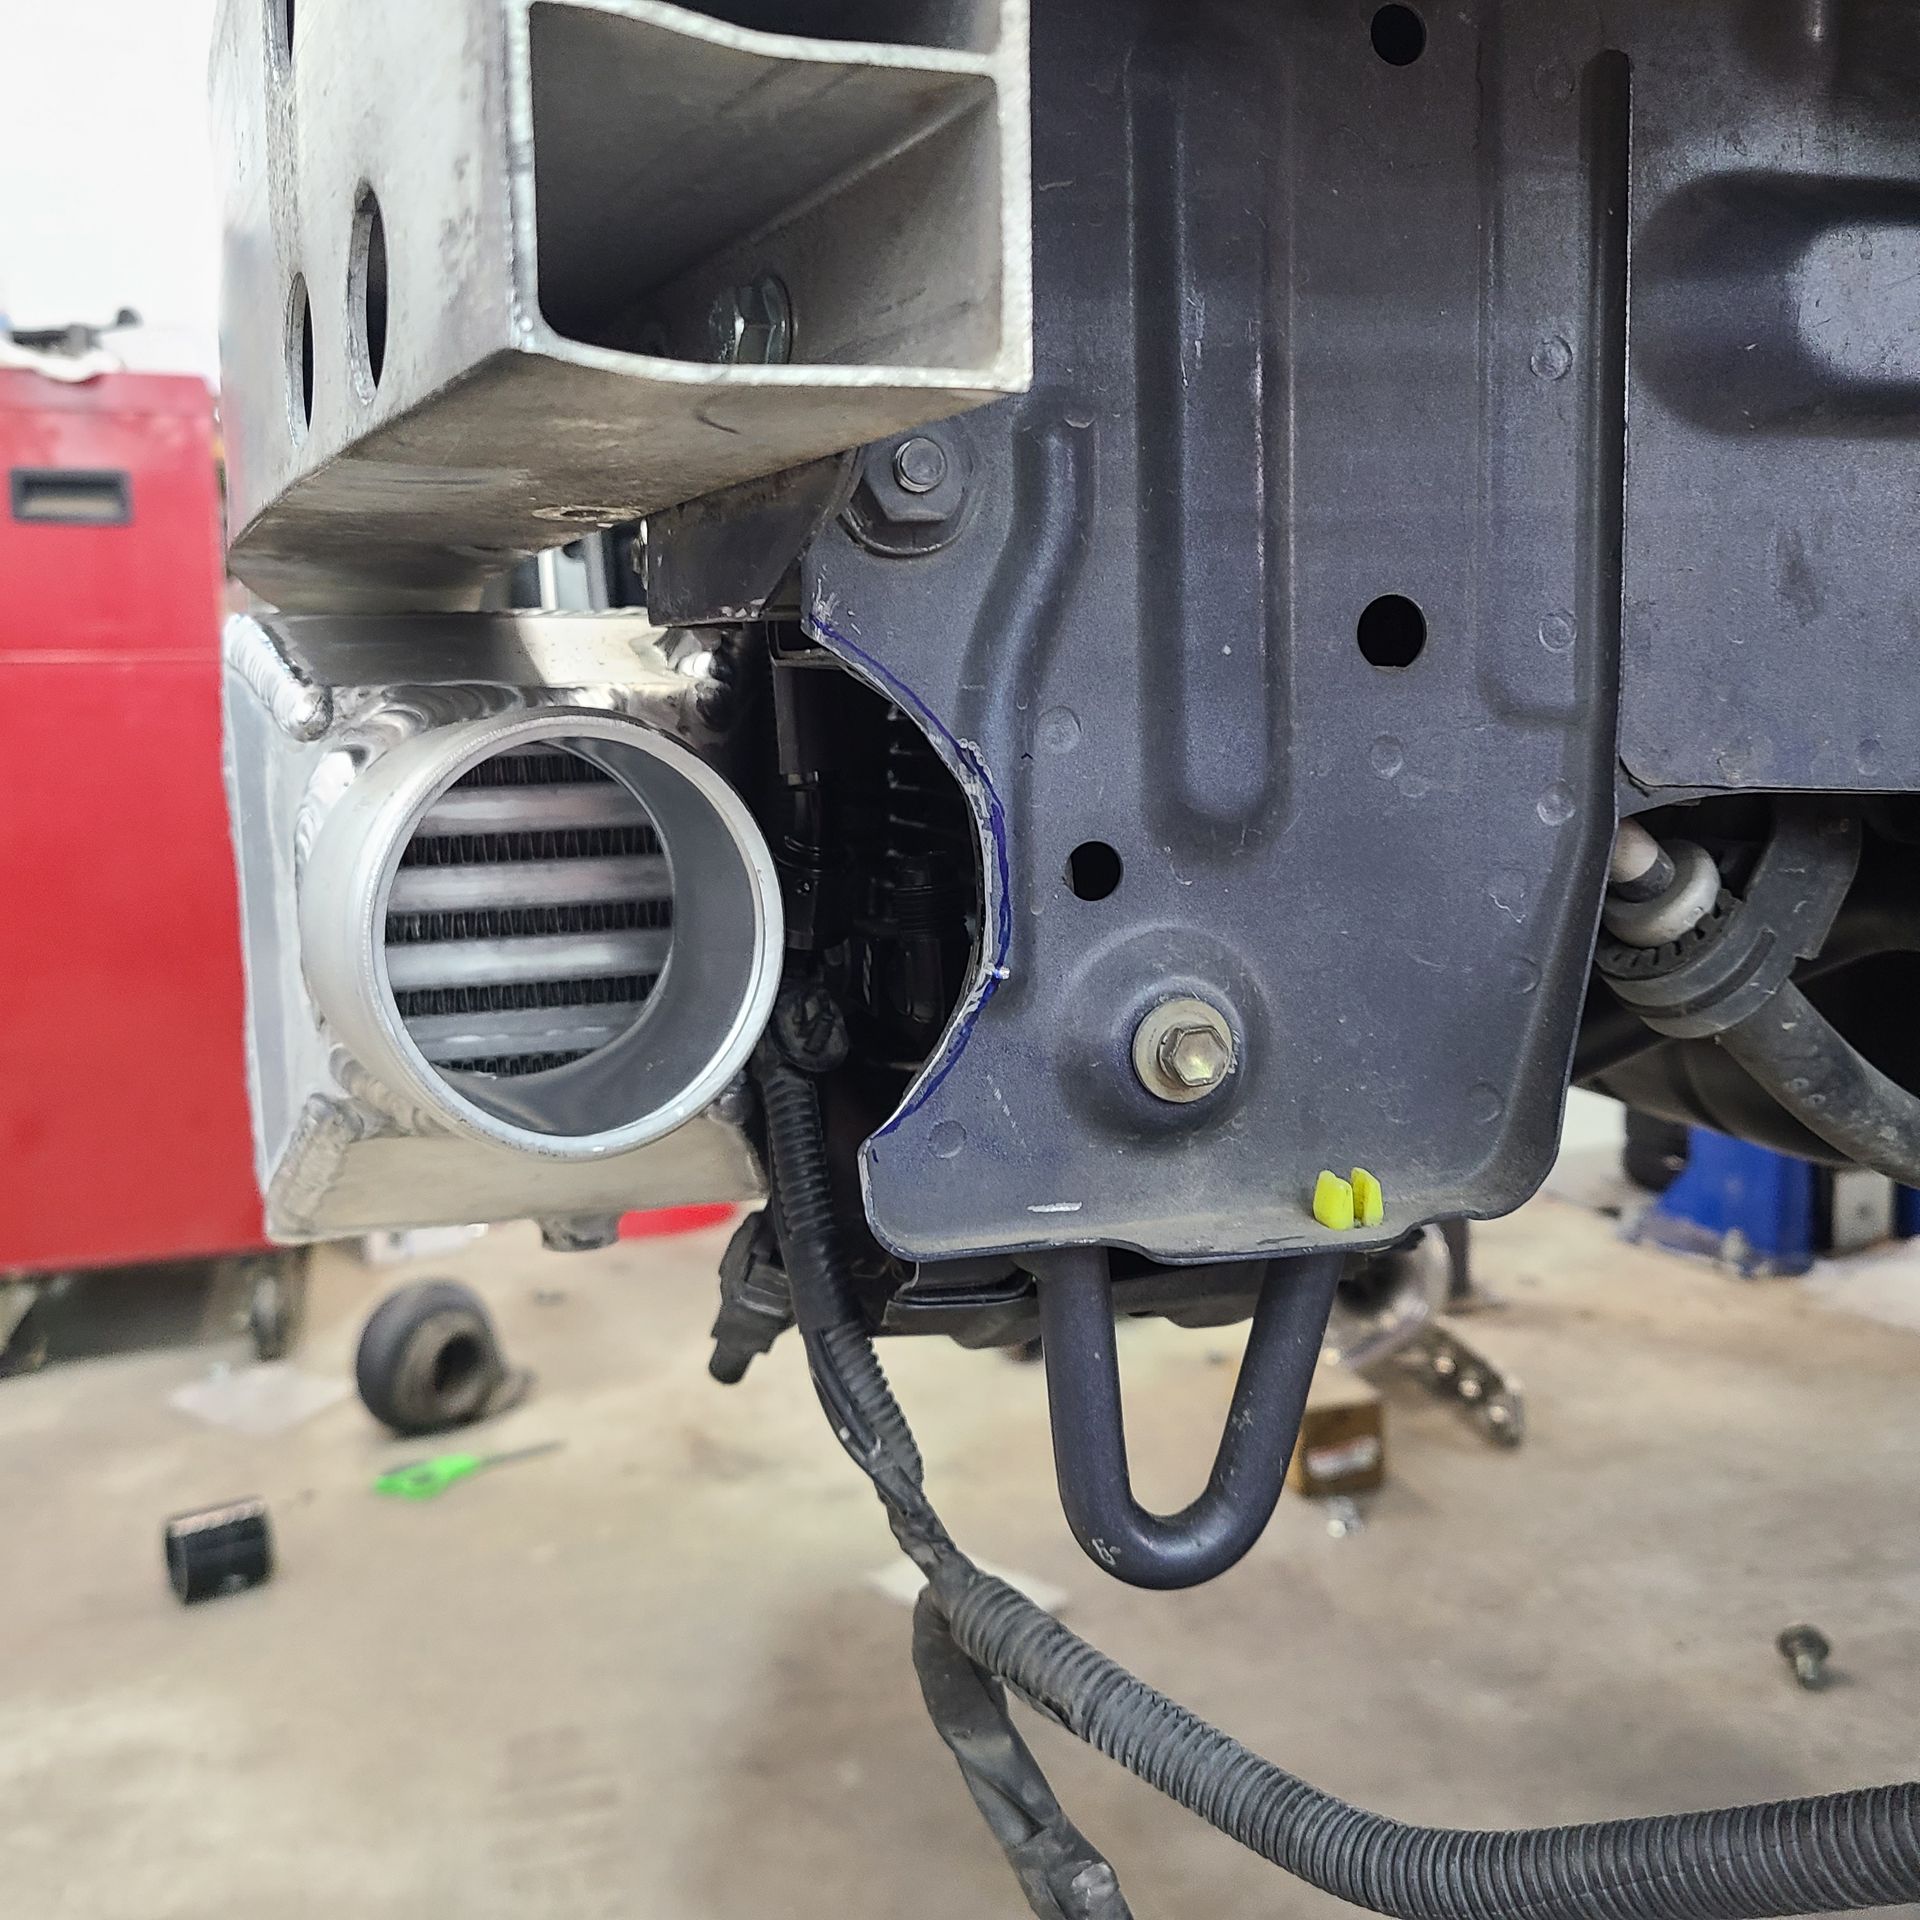
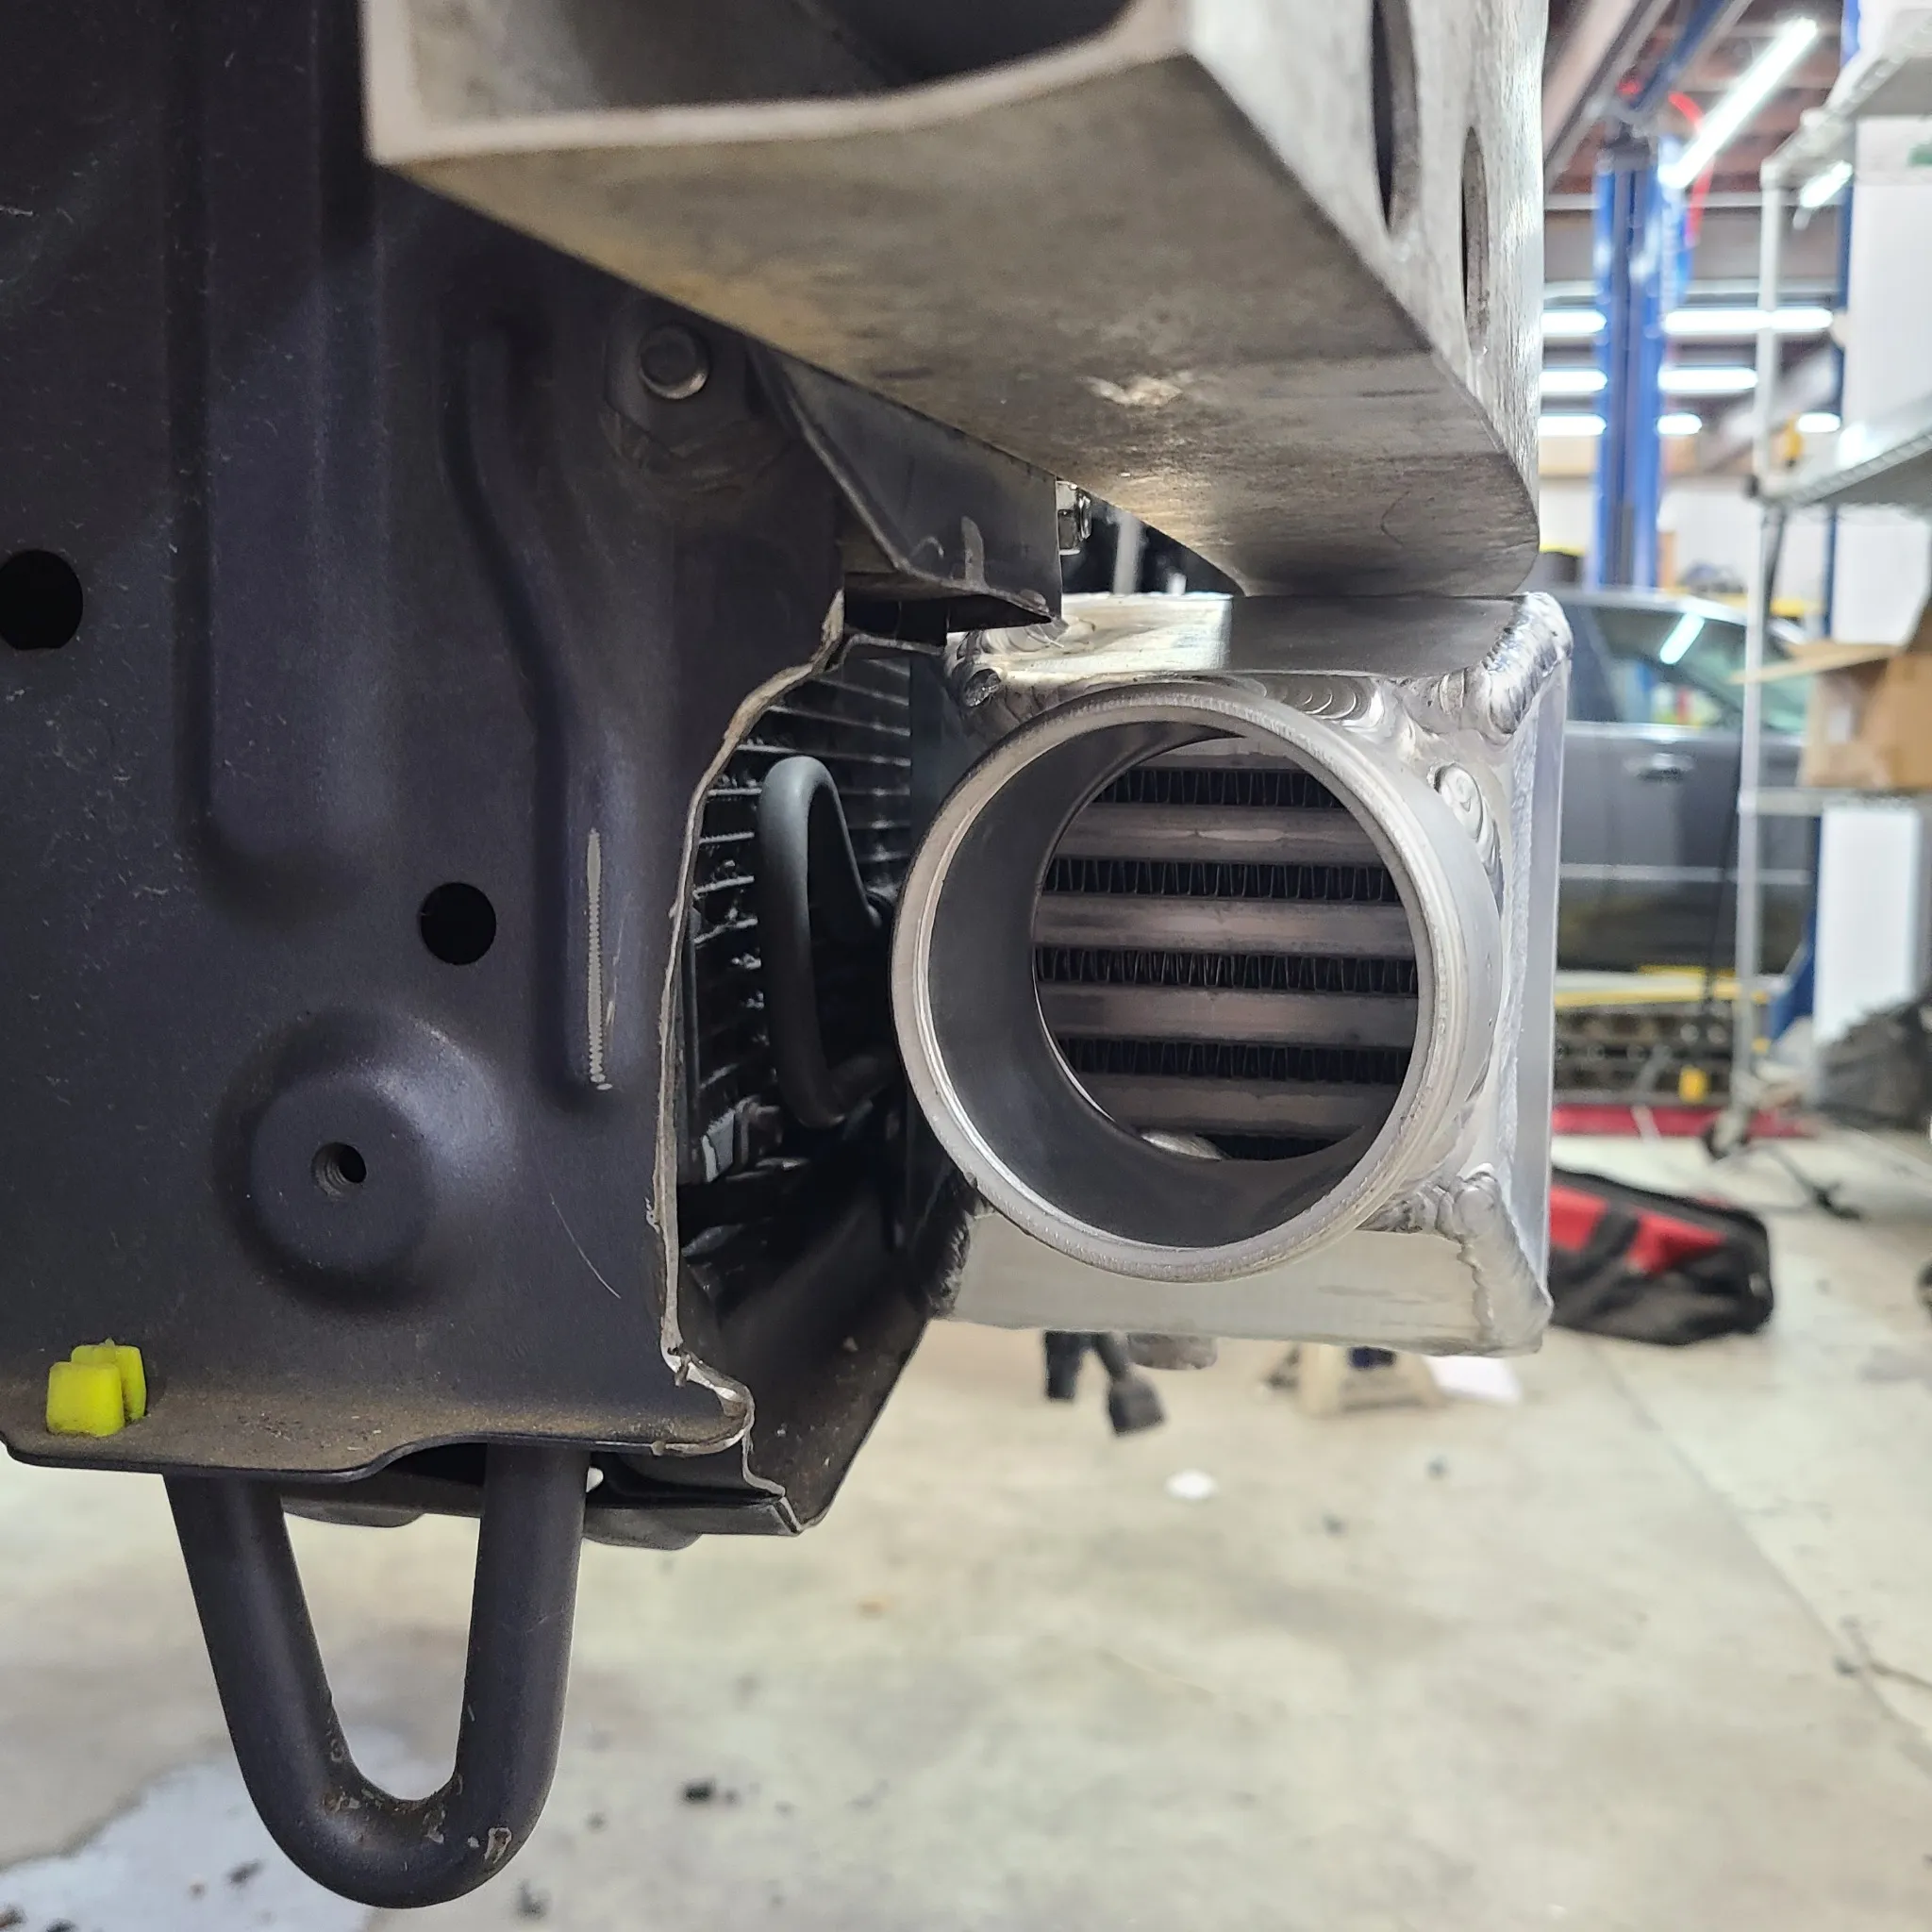
• Here you can see how the frame has been trimmed for clearance to help the intercooler pipes clear.
Fully mount the FMIC
Install the manifold, sensor, and Lines

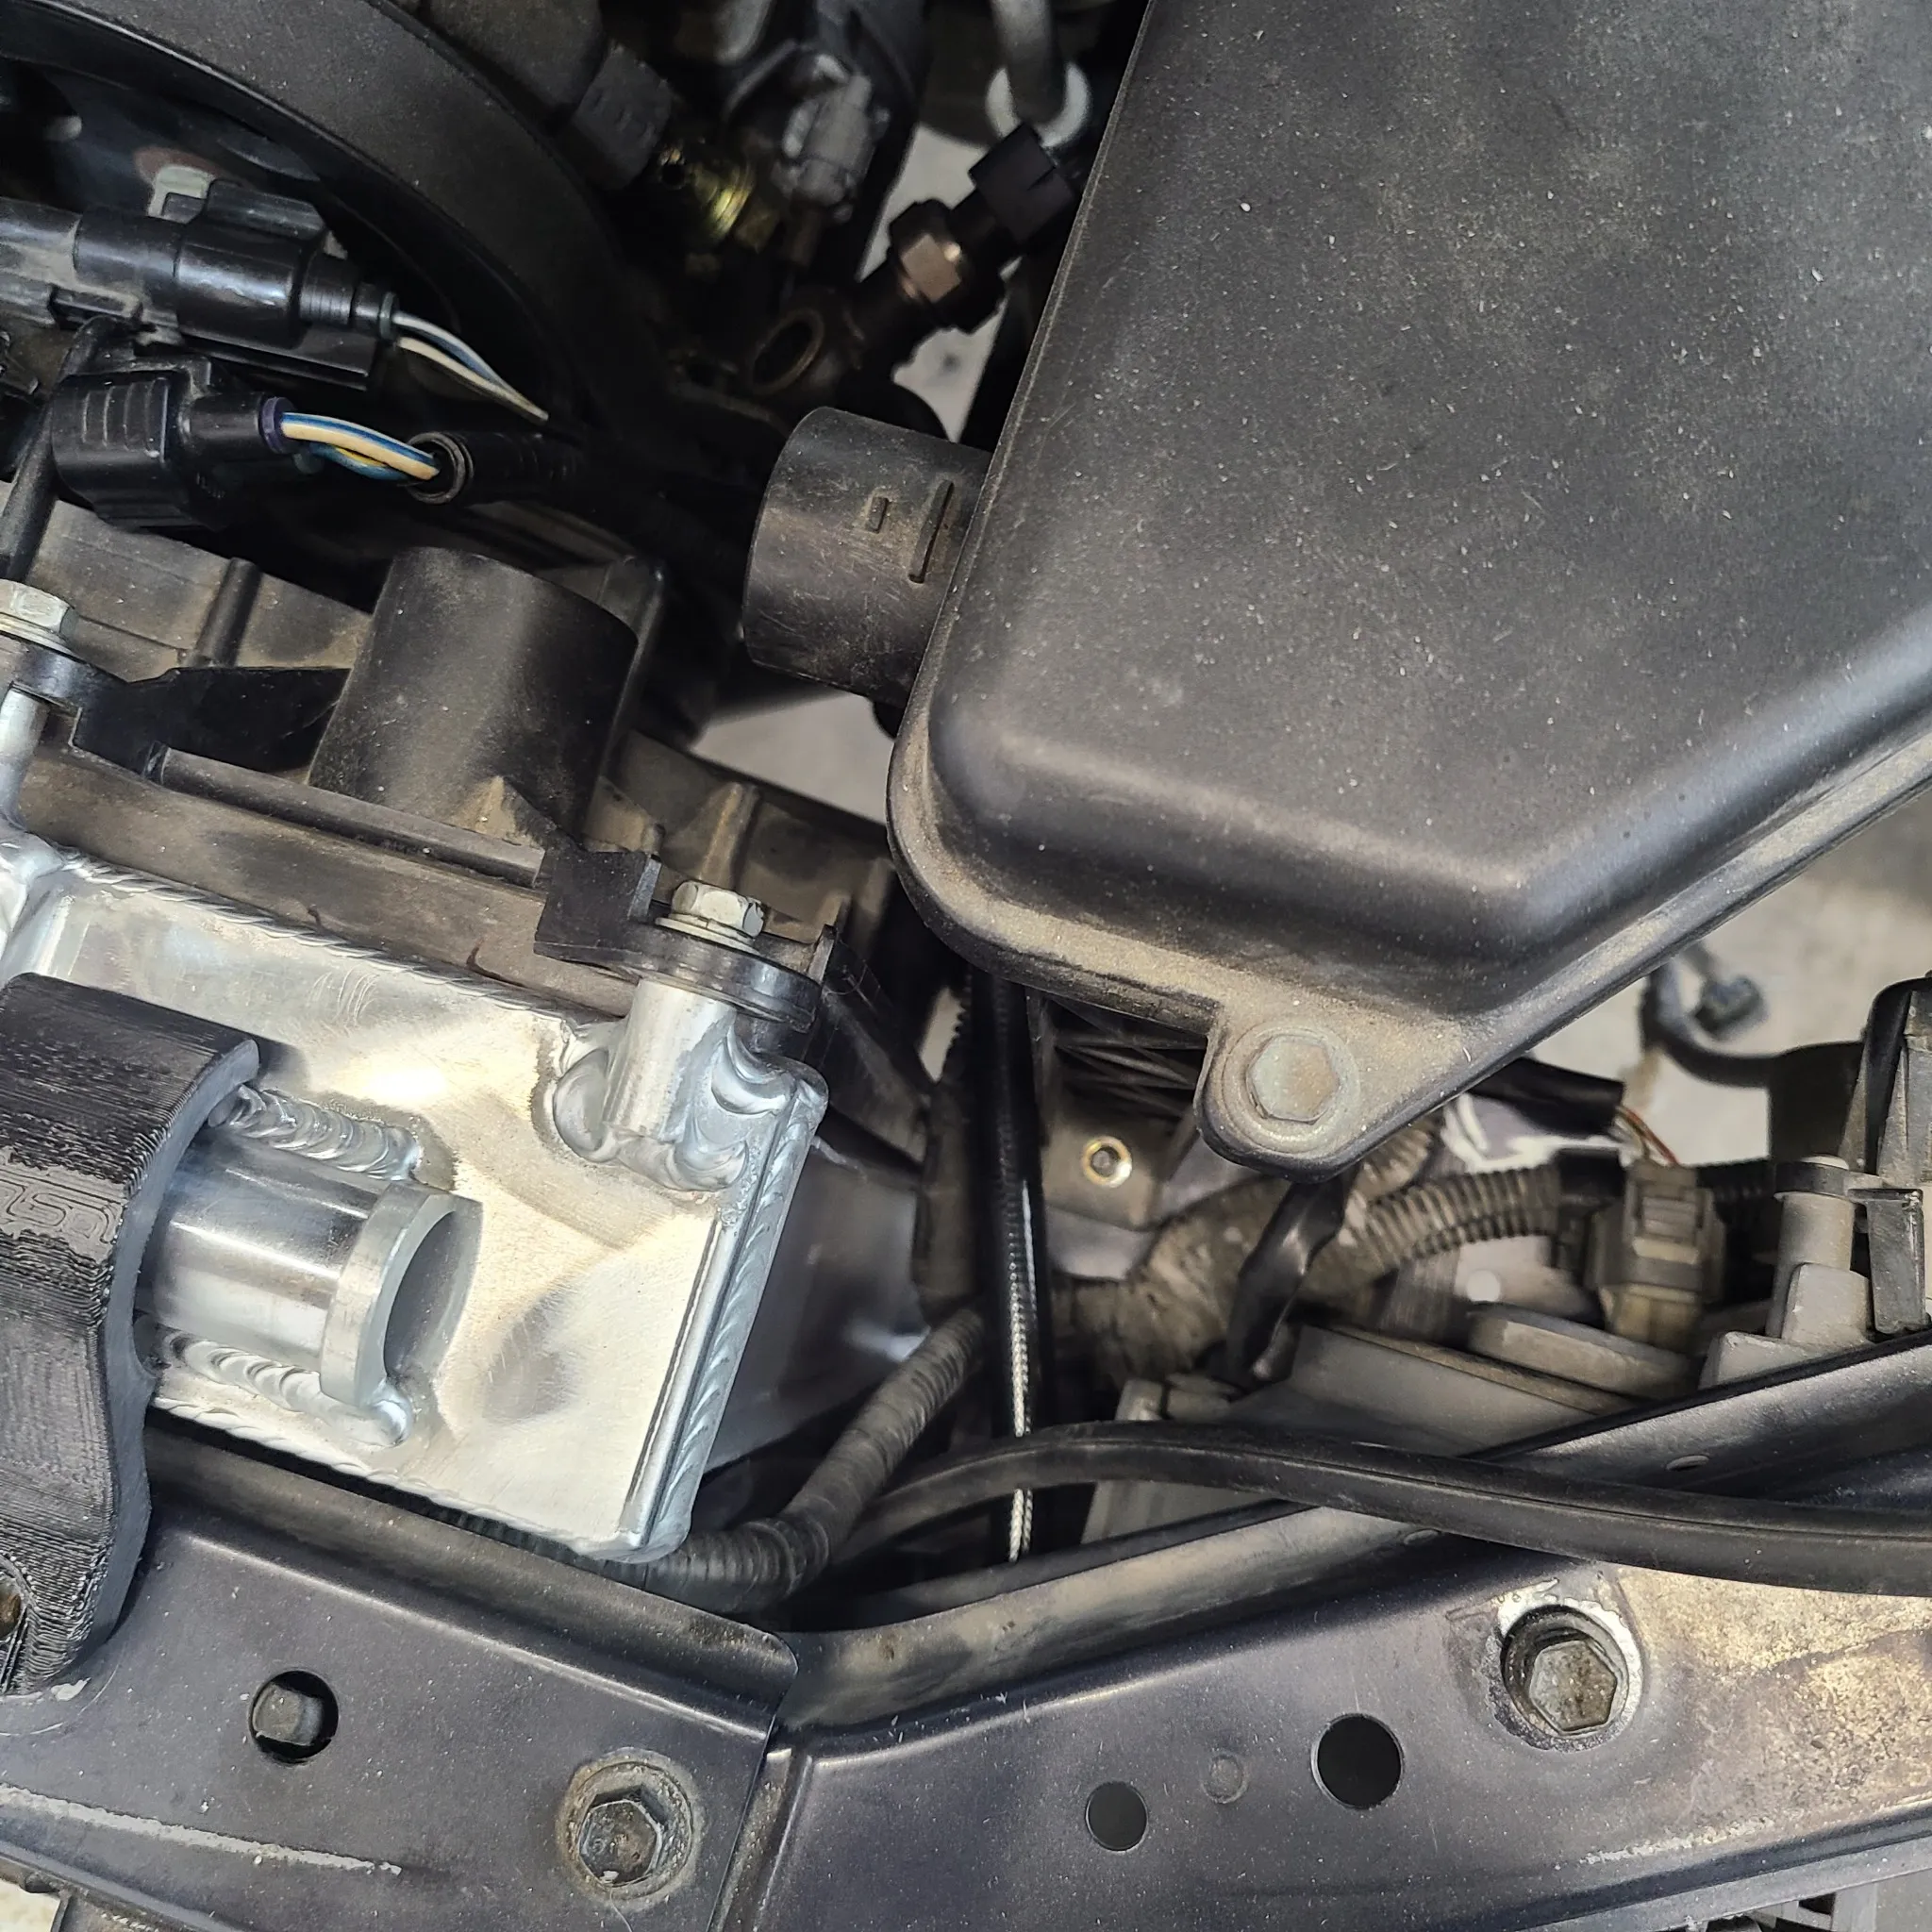
• Here you can see how we routed the line around the core support and up the frame to the firewall
Now all that is left is to recharge the AC system, install your intercooler pipes and reinstall the bumper.