This kit included the following items:
⦁ 1 Battery box, assembled. Battery box includes the following items:
⦁ Battery Box
⦁ Battery Box Lid
⦁ 2 Draw Latches
⦁ 3 Grommets
⦁ 1 Vent tube
⦁ 1 Vent tube 90 degree barb adapter
⦁ 2 M8x1.25 lock nuts
⦁ 2 Threaded tie-down rods (not shown in picture)
⦁ 2 M8x1.25 flange nuts
⦁ 1 Battery Tie-down
⦁ Battery box spacers
⦁ 1 Fuse Holder
⦁ 1 300 Amp Fuse
⦁ 4 Self Tapping Screws
⦁ 2 Billet Eyelets
⦁ 1 Positive Battery Terminal
⦁ 1 Negative Battery Terminal
⦁ 1 18 inch positive battery cable
⦁ 1 15 foot positive battery cable
⦁ 1 2 foot negative battery cable
⦁ 1 M8x1.25 x 16mm bolt
Step 1
First ensure all power on vehicle is disconnected and remove OEM battery if you haven't already. Back in the trunk, remove Trunk Carpet, Trunk Deck and Styrofoam insert on right side of trunk.
STEP 2
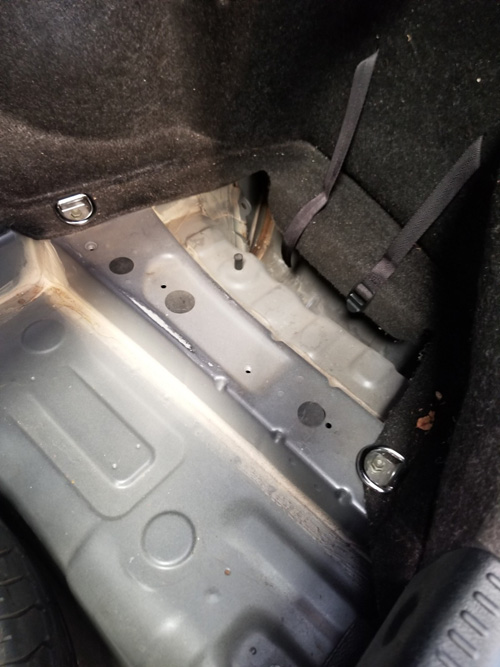
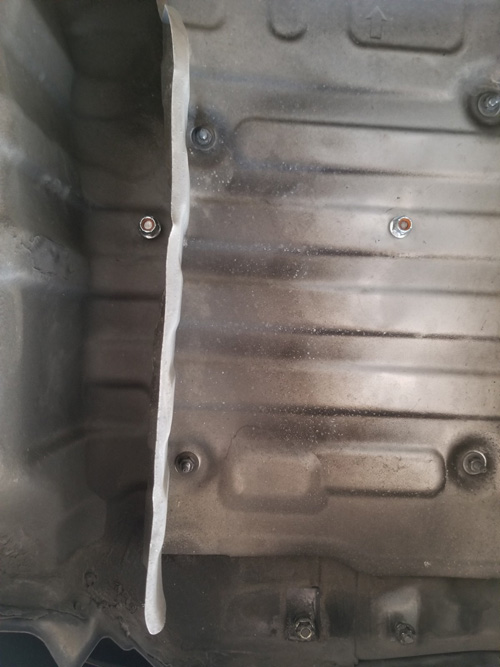
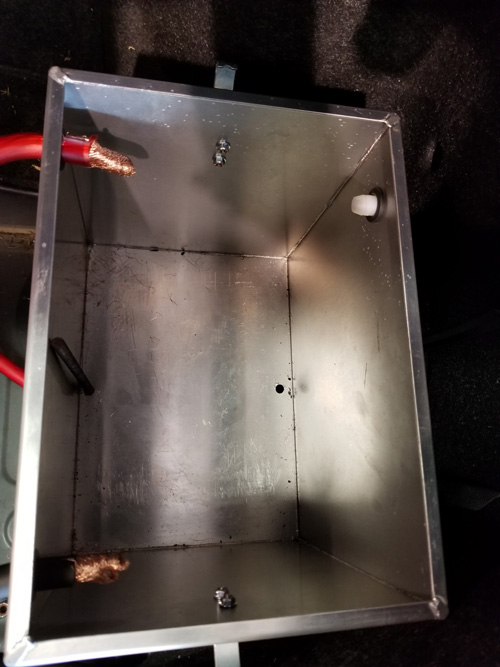
Place your battery inside the box and using a marker or grease pen mark the holes to be drilled as shown below. This will differ based on your specific battery.
Using a marker or grease pen, mark the drill points through the battery box bolt-down holes.
Position the battery box as shown in the above pictures to mark for holes to be drilled.
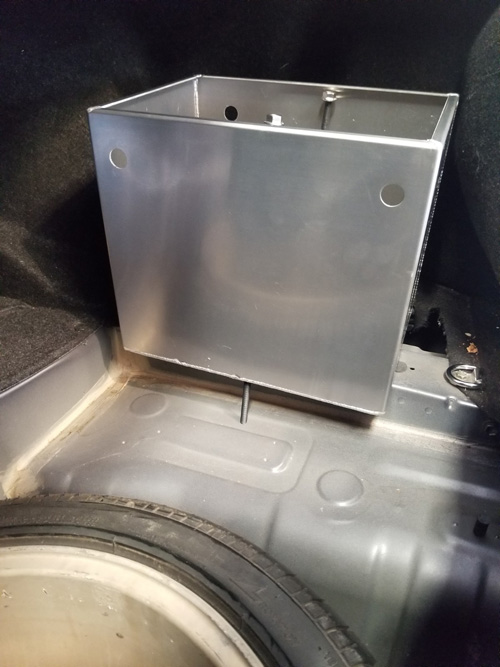
The box should be positioned on top of the frame rail as shown above, you also want to be sure to position the box as far inward as possible without obstructing use of the lid. The two hole side of the box should face the spare tire, and the single hole faces the trunk carpet.
STEP 3
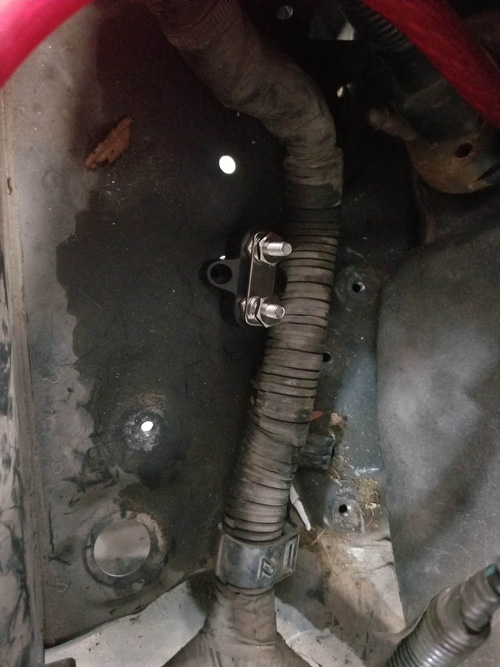
Once you've drilled your holes you can now add the locknut to the threaded rod. This is below where the battery box will bolt down. This may require removal of the exhaust, depending on the type of exhaust is installed.
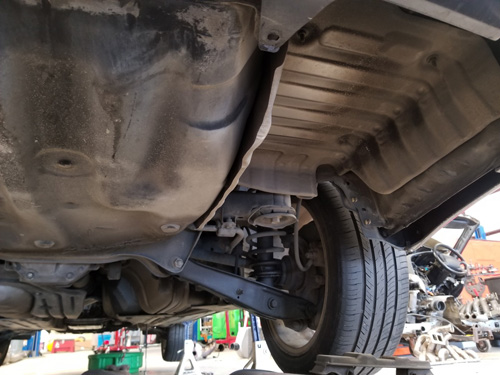
Note: I bent the left side of this shield back to give me more room to tighten the nut once fully installed.
STEP 4
Bolt the battery box down to the floor using the supplied fender washer and nut.
NOTE: The floor of the car is not flat like the bottom of the battery box. Bolting the box down will pull the floor up to the box and will slightly skew the box as it is pulled slightly out of shape. We have included 2 spacers with this kit to help it sit flush, one very slightly longer than the other. The threaded rod will sit inside these spacers and under the box.
STEP 5
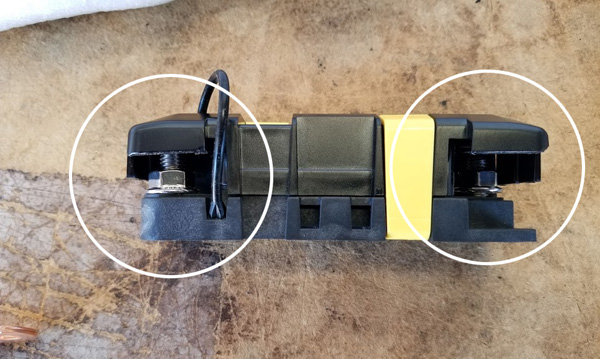
Using a Dremel, file or other tool, remove material from the fuse holder like shown in the picture. This will allow for battery cables to attach in the correct orientation.
STEP 6
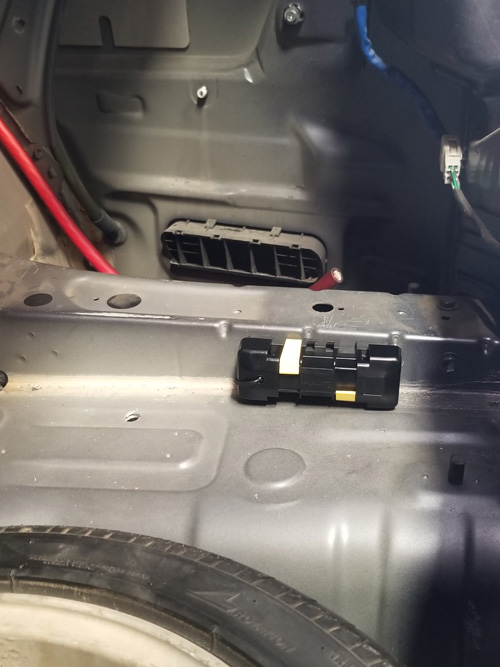
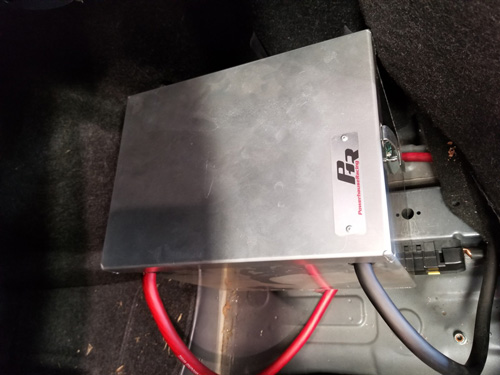
Mount the fuse holder to the frame under the battery box using the supplied self tapping screws.
NOTE: While the screws are self tapping, the frame is quite thick and you will need to predrill holes using a 1/8 inch drill bit. The screws cannot tap into the frame by themselves.
DO NOT install the fuse until after the entire installation has been completed.
Note: Make sure you can clip and un-clip the top of the fuse holder.
STEP 7
Remove the factory battery and battery tray as shown below

STEP 8
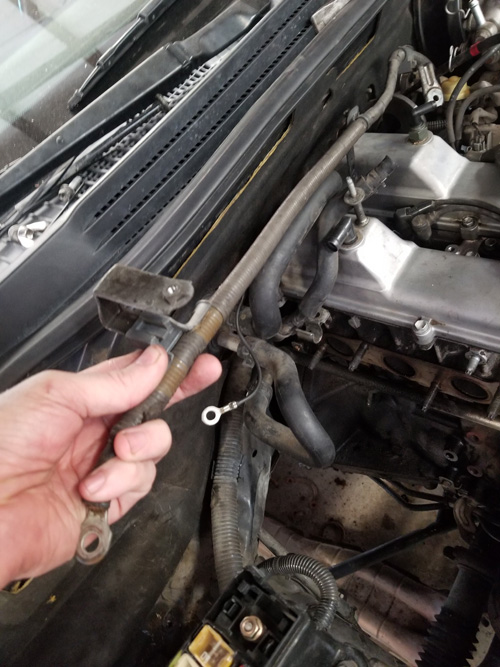
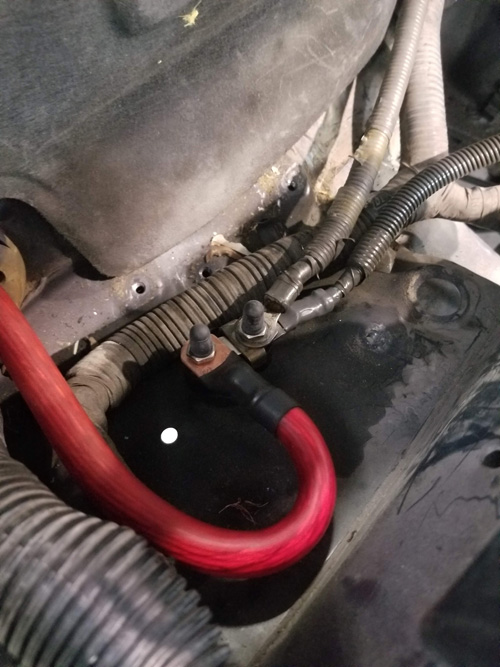
Take the junction block and mount behind the fuse block use the self-tapping screws provided as shown below
STEP 9
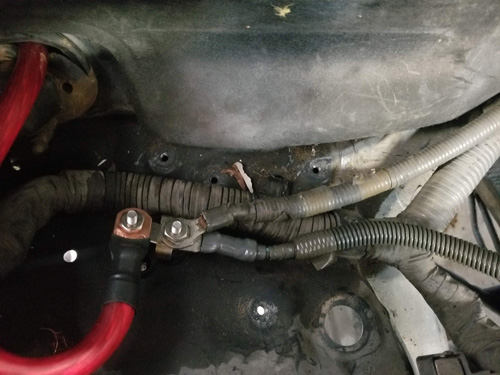
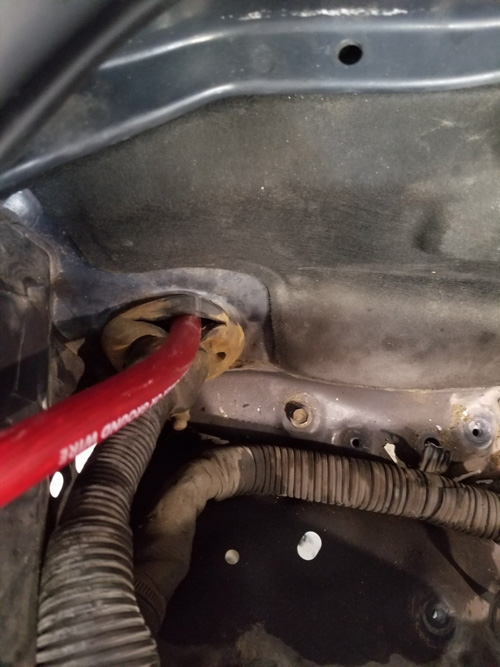
Remove the negative battery cable from the lower passenger side of the engine block, as shown below. You can discard this now as it will not be used.
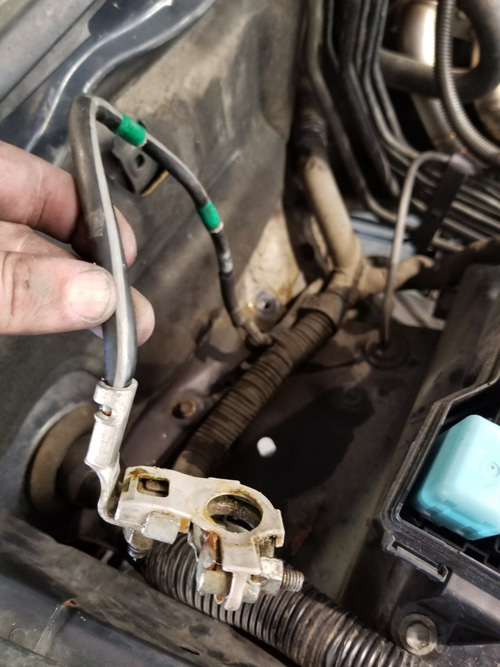

Remove the starter cable wire and run it behind the engine as shown below. Then attach to the junction block you mounted in the previous step.
Next take the cable that powers the fuse box and attach it to the junction block
STEP 10
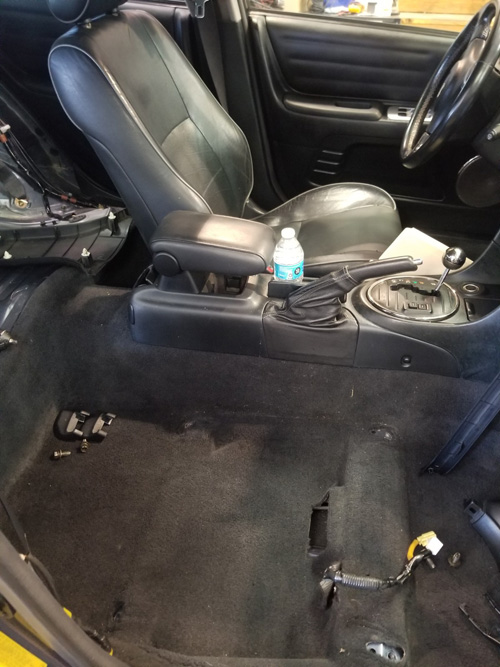
Run the long battery cable in the shortest route to the front of the car where the you have the junction block mounted. This route should be as direct as possible. Run as shown in the picture forward and along the side of the rear seat, under the rear seat. Then under the carpet along the door side of passenger seat.
CAUTION: Avoid any sharp edges that can damage the cable. Protect the cable anywhere it might get damaged or cut.
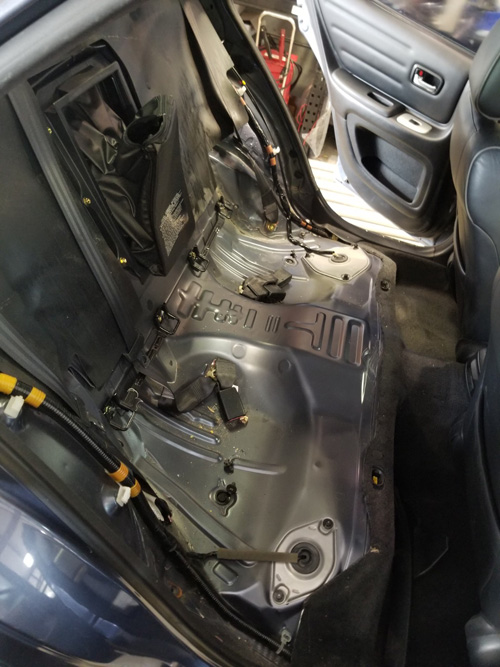
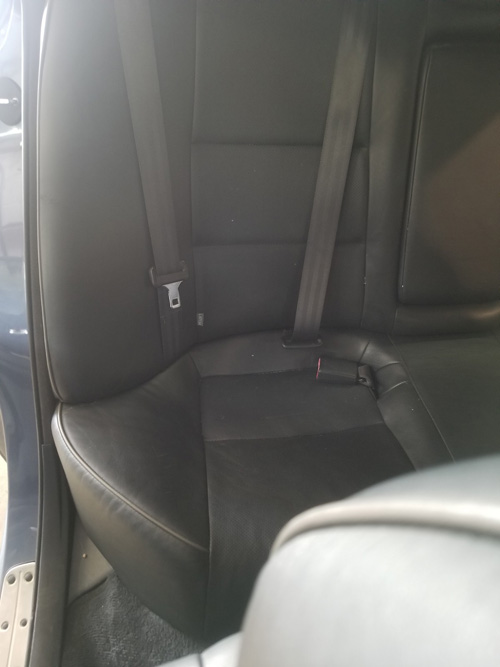
Remove the rear seat bottom and back as shown below. The bottom portion has 2 pull clips and lifts straight up. The back of the seat has several bolts that must be removed. Then it lifts upward (towards to roof of the vehicle)
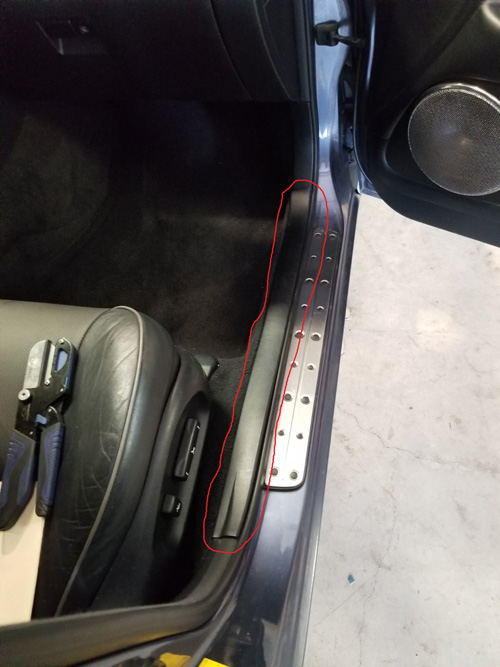
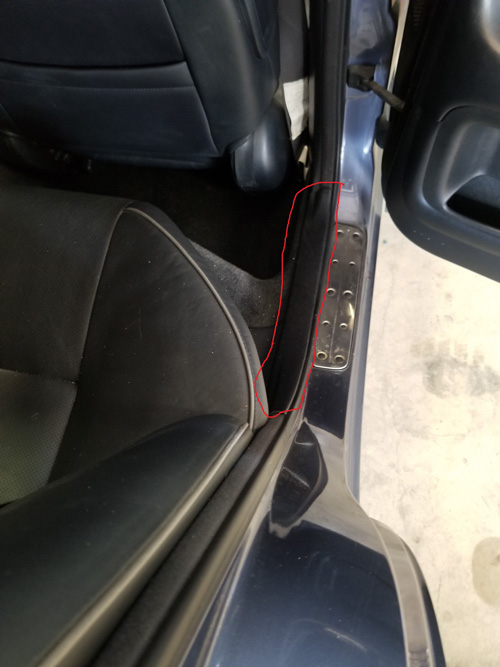
Next remove the black plastic trim pieces to expose the carpet. You DO NOT need to remove the silver show/kick plates to do this step. These are circled below.
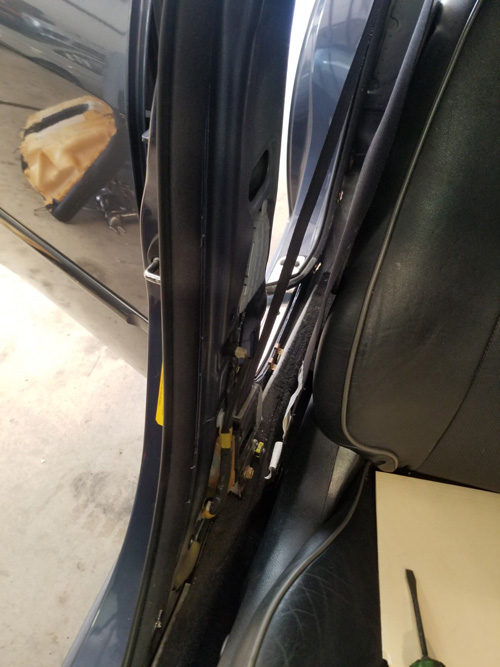
Next remove the panel from the a-pillar that houses the passenger seat belt assembly.
Next unbolt the passenger seat and remove from the vehicle. Be careful, there are 2 electrical plugs that must be un-done before completely removing the seat. To achieve this I unbolted the seat and leaned it backwards.
Now you can start to run the wiring from the junction block in the engine bay to the trunk area.
STEP 11
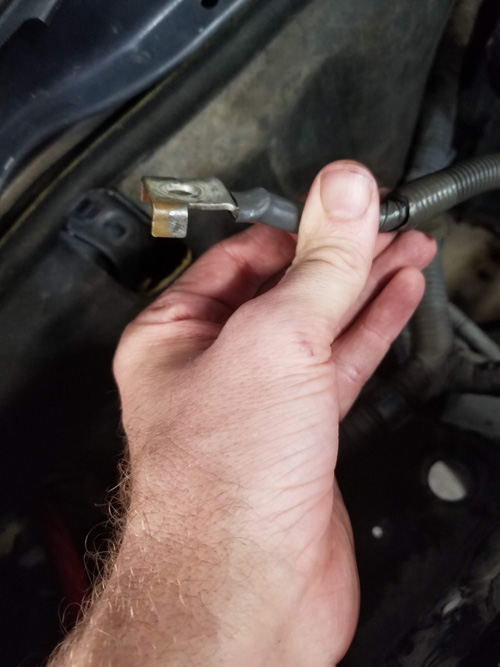
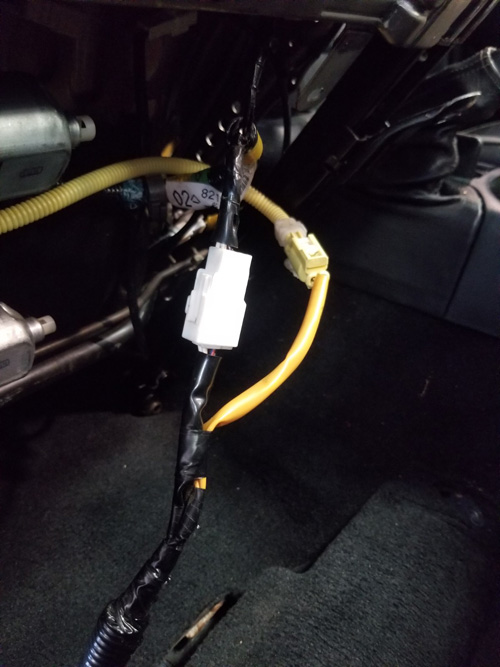
Located the engine harness grommet and feed the long 0 gauge wire through it. It may be necessary to make a small cut in the rubber grommet to do so.
Once you have fed the wire through the grommet you can bolt it to the junction block. Work your way into the interior and pull the carpet out of your way. Run the length of the cable under the carpet and in a way that it wouldn't get damaged. There is a large hole you can run the cable through here as shown below.
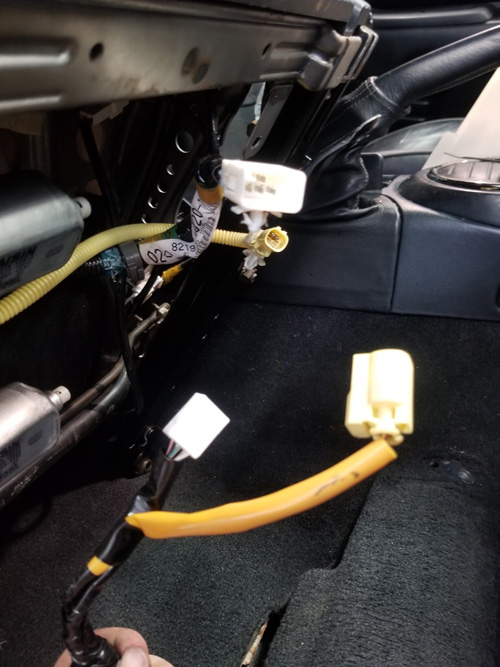
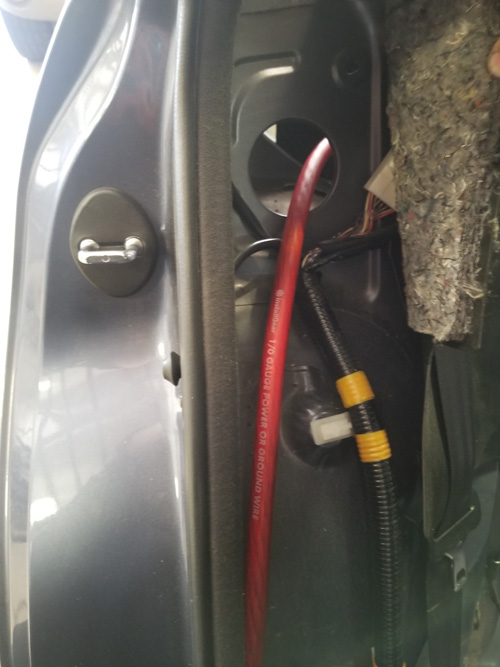
Next run the cable along the passenger side of the cable until you reach the rear of the car.
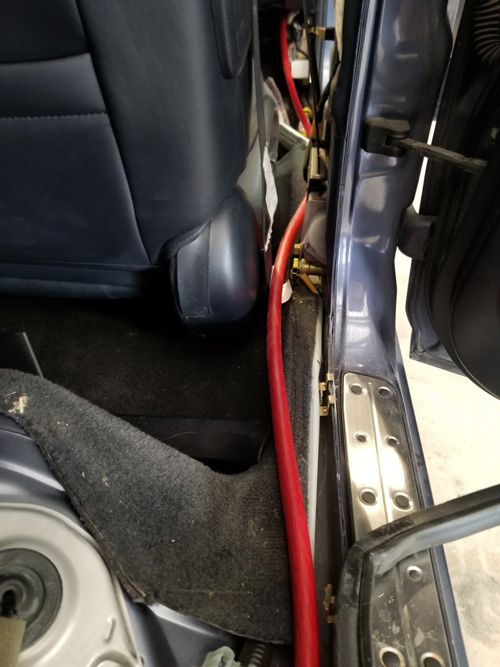
Here there is another hole you can run the cable through to reach the trunk area.
STEP 12
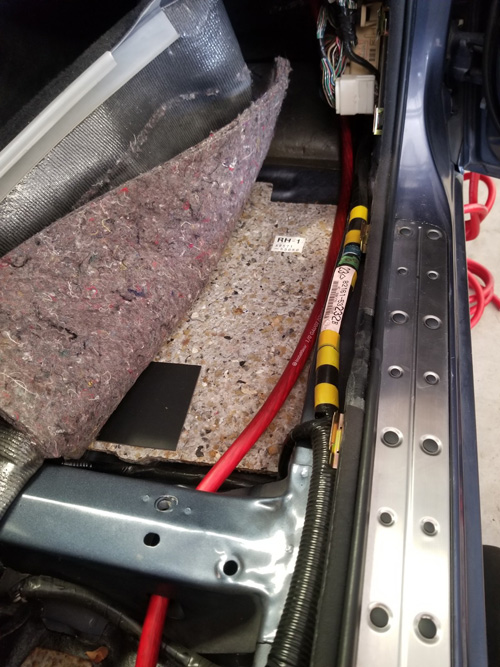
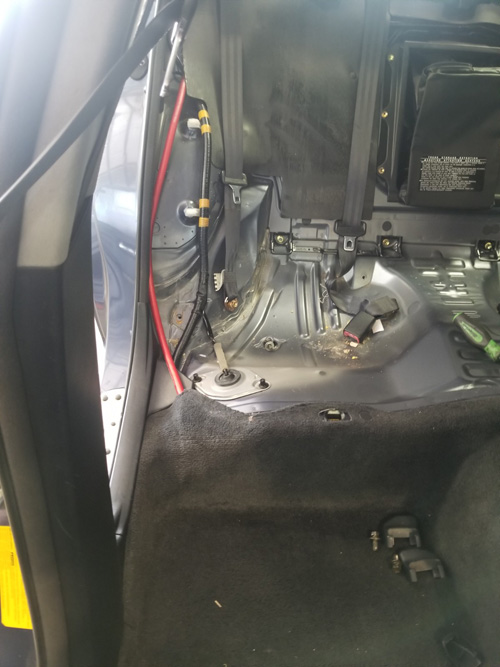
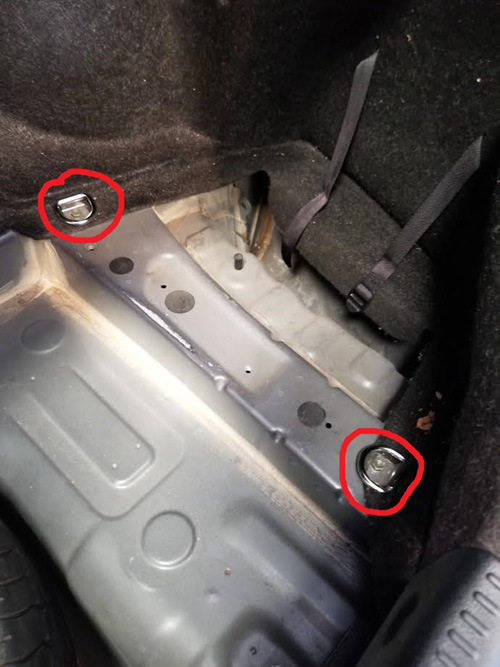
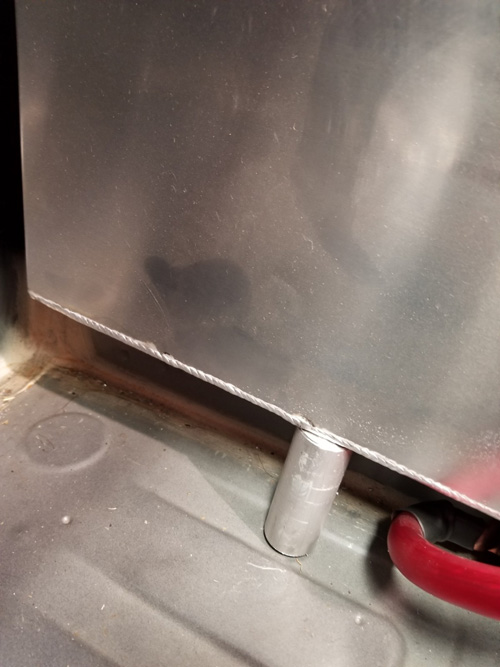
Next to route the battery cable you will need to remove the trunk liner on the passenger side. Start by removing these two tie downs circled below.
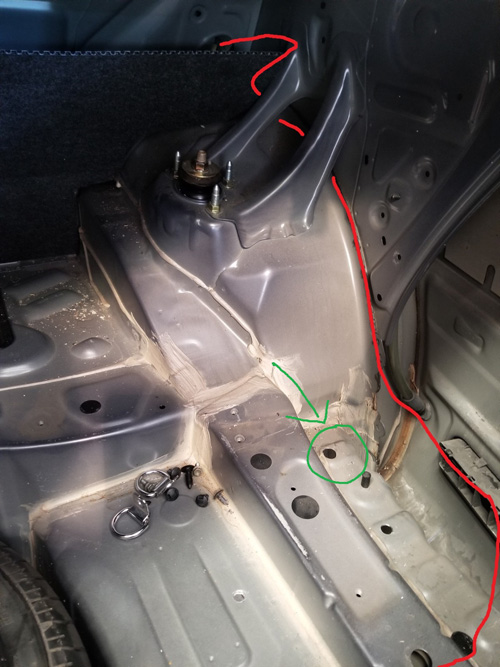
Next located all of the clips along the liner and remove them with a clip puller or carefully with needle nose pliers. Avoid damage to these as you will want to re-use them when re-installing. Run the cable as shown below. This route will keep the cable out of sight and make it the perfect area for the fuse block. The green circle is also a hole you must drill for the breather tube to fit into. This can be done by mocking up the box and inserting the tube to get an idea of where its going to sit. A stepped drill bit will work perfect for this.
Before positioning the battery box in place find a good clean ground and attach the cable. Here I choose to use one of the existing holes that the metal ring bolted to. (below) You can choose wherever is most ideal for your particular vehicle.
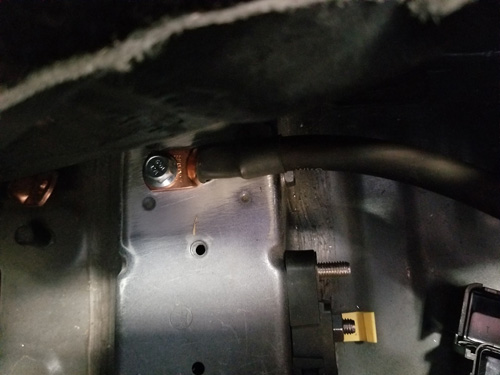
Note: If you are not using the same location follow these instructions for the ground cable.
Using a drill and tap, tap the frame near the battery box with an M8x1.25 tap.
Using some sandpaper or other abrasive, remove the paint around the tapped hole to provide a good area for grounding the battery.
STEP 13
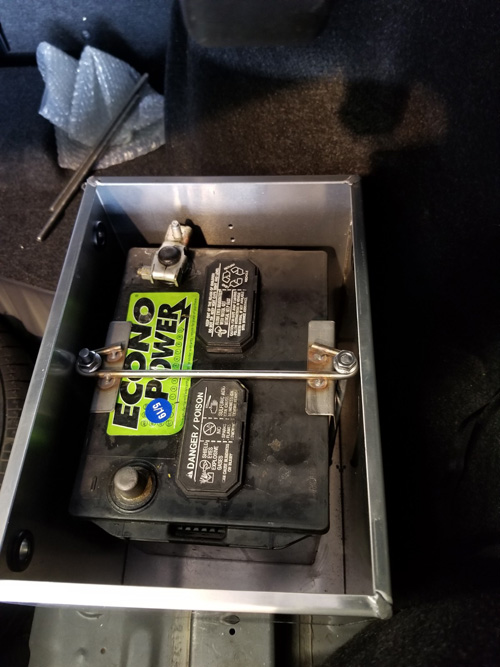
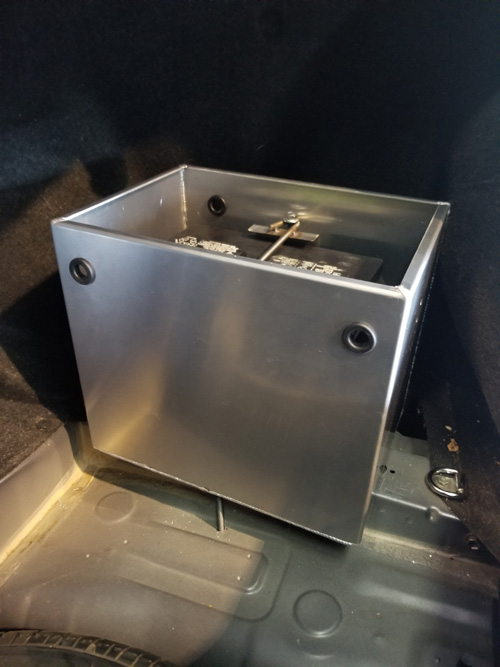
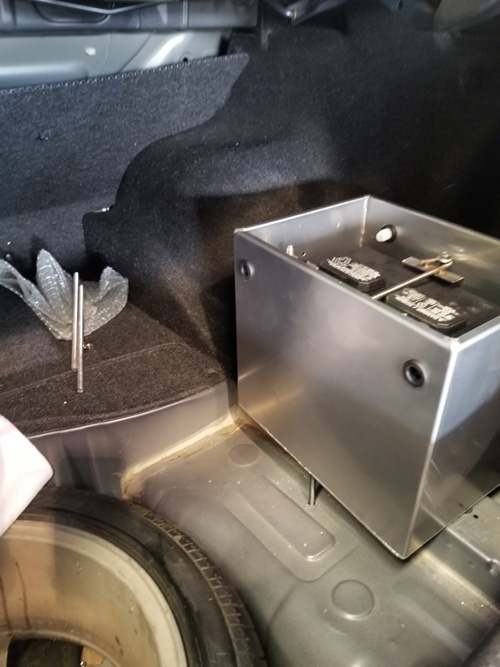
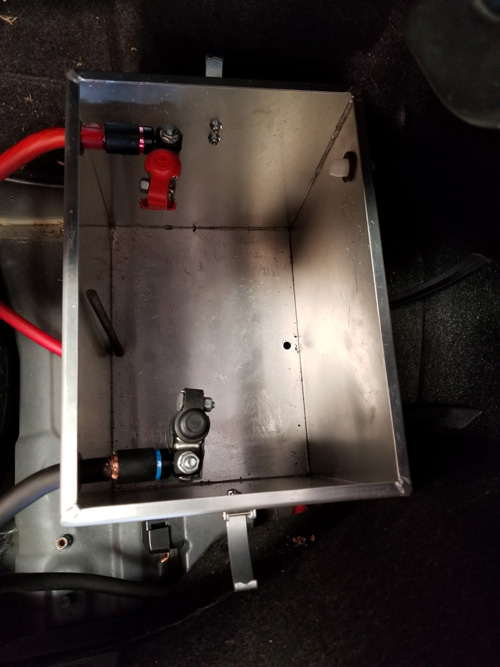
Now reinstall the trunk liner and place the battery inside the box. Take the threaded rods and add the spacers to the underside of the battery box as shown in the pictures below.

Insert the supplied rubber grommets into the 3 holes in the battery box. The rear one is for the breather tube. Insert the tube into the plastic elbow and place inside the box, and place inside the hole you drilled previously.
STEP 14
Install the positive cable from the front of the car to the fuse block, then take the shorter positive cable and attach it to the opposite side of the block. Expose the wire as shown below of the positive and ground cables.
NOTE: Prior to connecting the battery terminals fully now is a good time to re-connect the airbag sensor you disconnected under the passenger seat
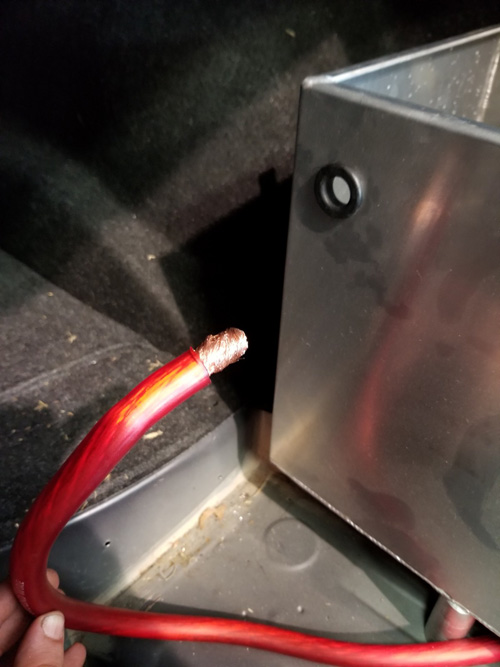
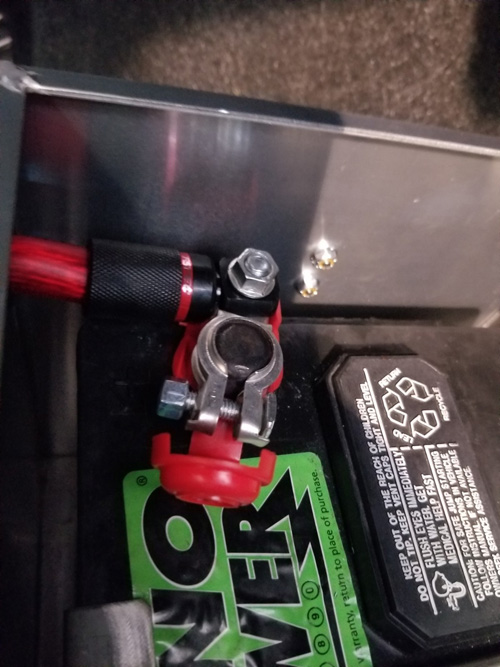
Push the battery cables through the grommet into the battery box. It is a tight fit, so use WD-40 to make the cable slippery enough to slide through the grommet. Cut the cables to length and trim the insulation from around the end of the cable about 1 inch back.
Attach the billet eyelets to the end of the battery cables and attach to the battery using the battery terminals.
CAUTION: Be careful that the positive eyelet cannot touch any part of the battery box or it will short out!! If needed add insulation around the eyelet to make sure this cannot touch anywhere. Also be sure that the lid cannot come in contact either!!! This area is not fused so any contact will cause serious damage to the battery box, battery or cable.
You can now insert your battery and use the tie downs to secure the battery fully, and tighten the terminals down firmly.
STEP 15
You can now install the battery box lid, and the fuse. Trim the Styrofoam padding that was removed in step 1 to fit nicely around the box, and the battery cables.
Test the system to ensure everything is wired and connected correctly. Once the vehicle is running and you have secured the wiring you can install the interior pieces in the following order
Rear seat
Rear trim panel
Seat belt trim panel
Front seat (plug the connectors back in)
Front trim panel
Installation is now complete.