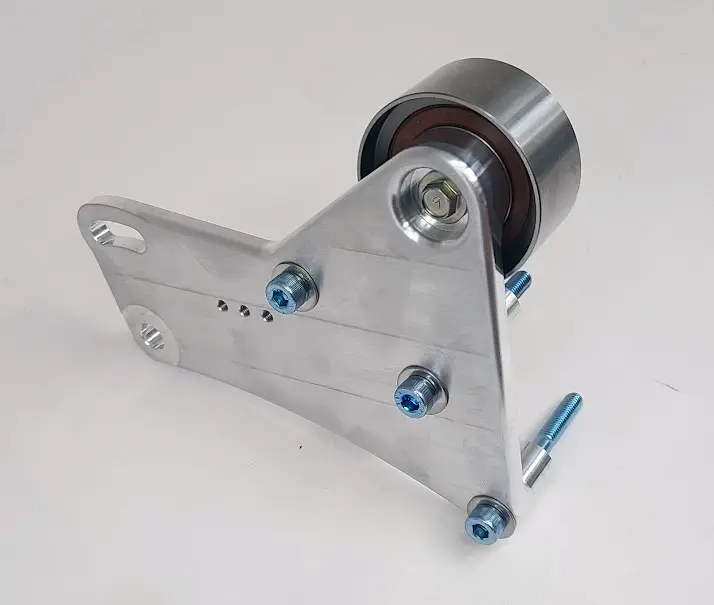
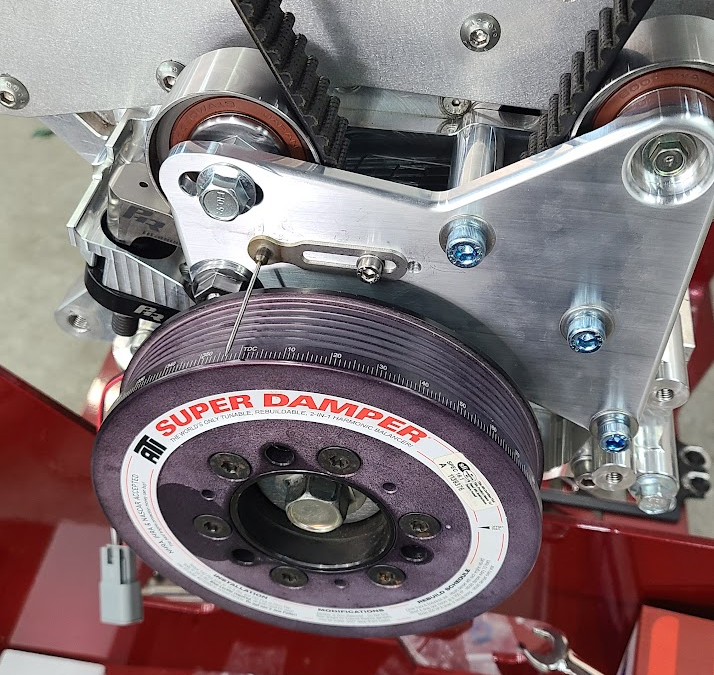
The PHR "Full Send" Timing Support Bracket is designed for only the highest horsepower producing 2JZ engines in the world! This bracket is essential for high-horsepower, high-RPM 2JZ engines, where the increased stress can cause the timing belt tensioner stud to detach from the front cover or oil pump.
How it works:
The PHR timing support bracket solves all problems of strength for the factory style timing belt tensioning system. Instead of using the timing belt tensioner bracket and manual tensioner as the mechanical leverage against the belt, all pressure is instead transferred into the support bracket which has several attachment points. This design eliminates 99% of the stress on the timing belt tensioner, its stud, and the tensioner bracket. Further, if some catastrophic failure of the "Full Send" bracket were to somehow happen, all original components remain in place as a backup to maintain system integrity.
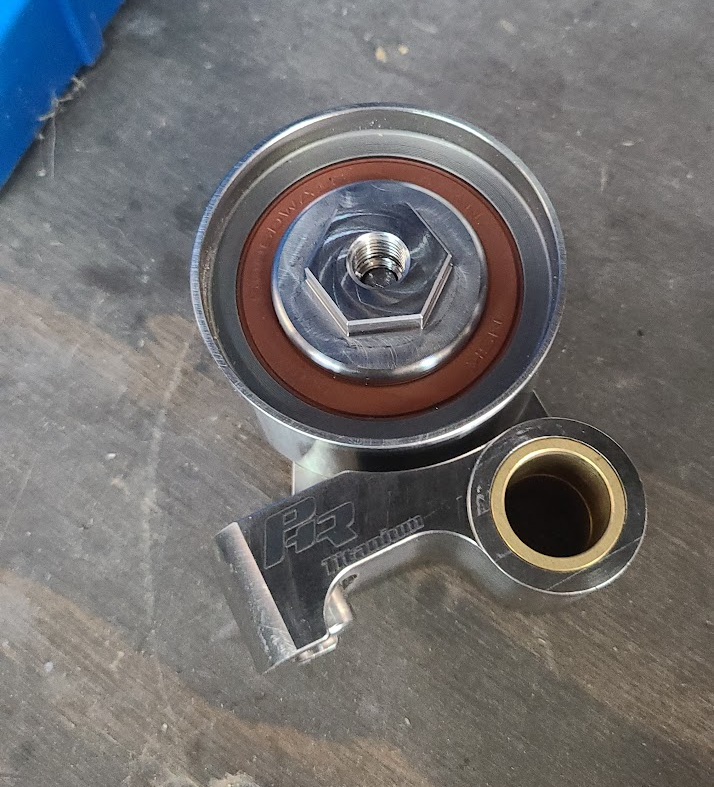
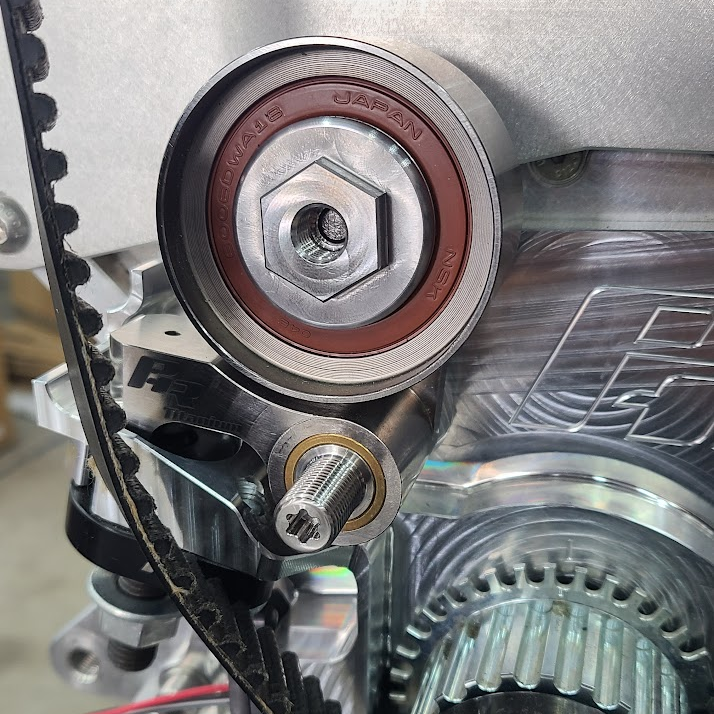
With this bracket, the tensioner and its bracket function primarily as a jack screw to set the timing belt tension, but the pulley is now locked to the front plate by a 10mm Class 10.9 Bolt. You use the manual tensioner to set belt tension and timing only. After belt tension is set, you lock it in place.
In addition, the bracket offers further rigidity to the pulley system, which will reduce belt deflection and improve mechanical timing synchronization between the crankshaft and camshafts. This also increases belt life and can improve the electrical timing sync.
Additional Features:
Further, the bracket also features
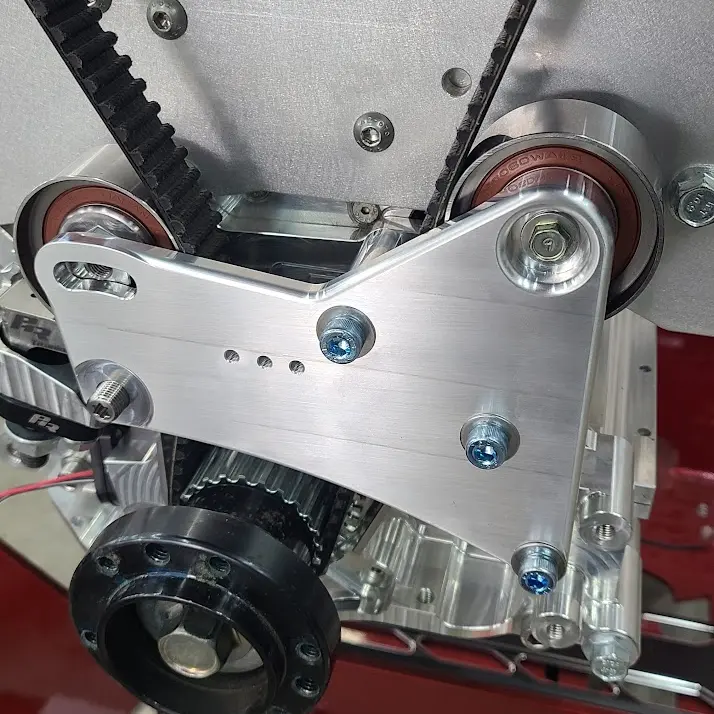
- Secondary idler pulley option for enhanced belt stability
- Built-in adjustable timing pointer for precise timing adjustments
Additional Parts needed:
- Manual Tensioner
- Optional Secondary Idler Pulley
- Optional Piston Stop (for finding TDC)
Other Considerations
This bracket is not compatible with factory timing covers. It is designed for the most extreme drag race situations where the front timing covers are often removed to ease serviceability of the front timing components.
Installation:
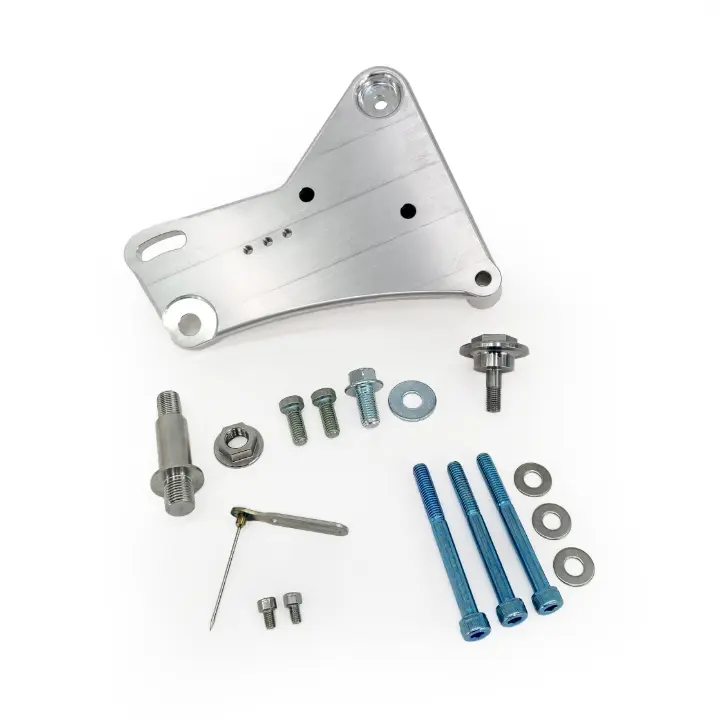
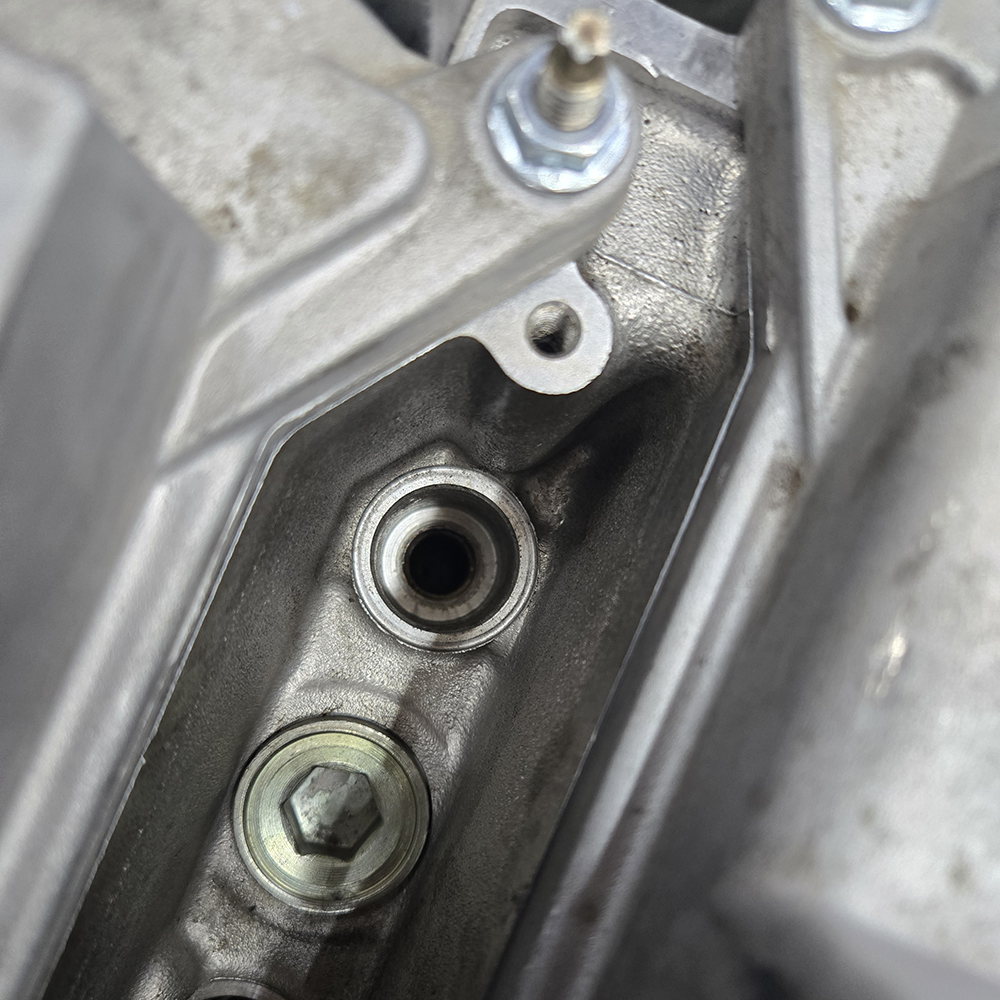
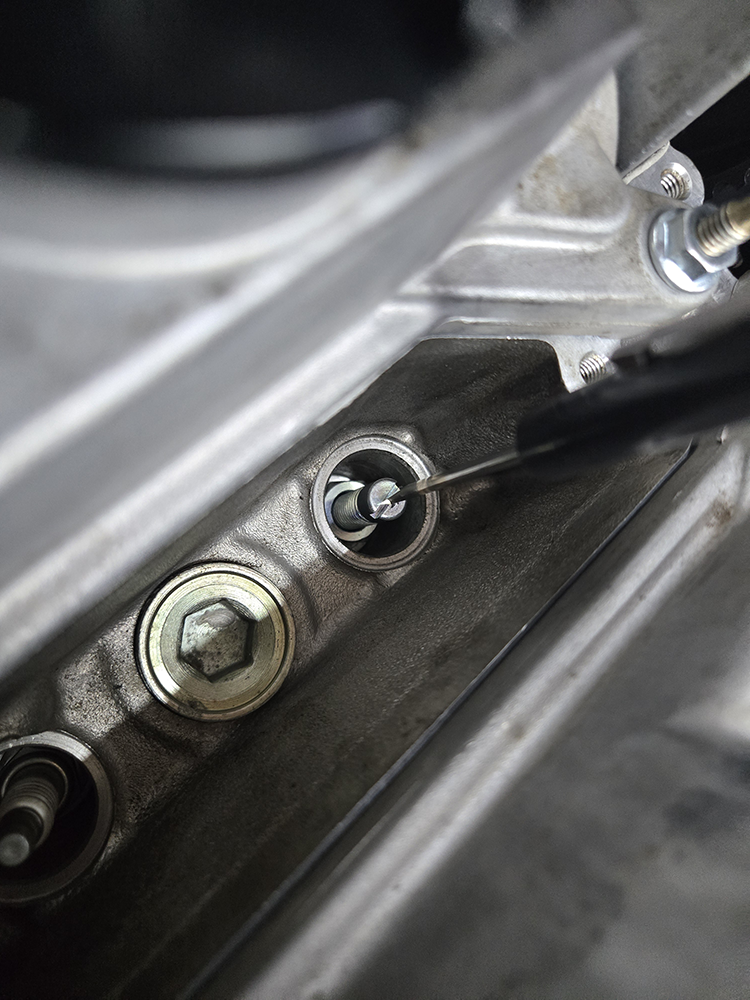
Step 1: Install Stud and Low Profile Bolts
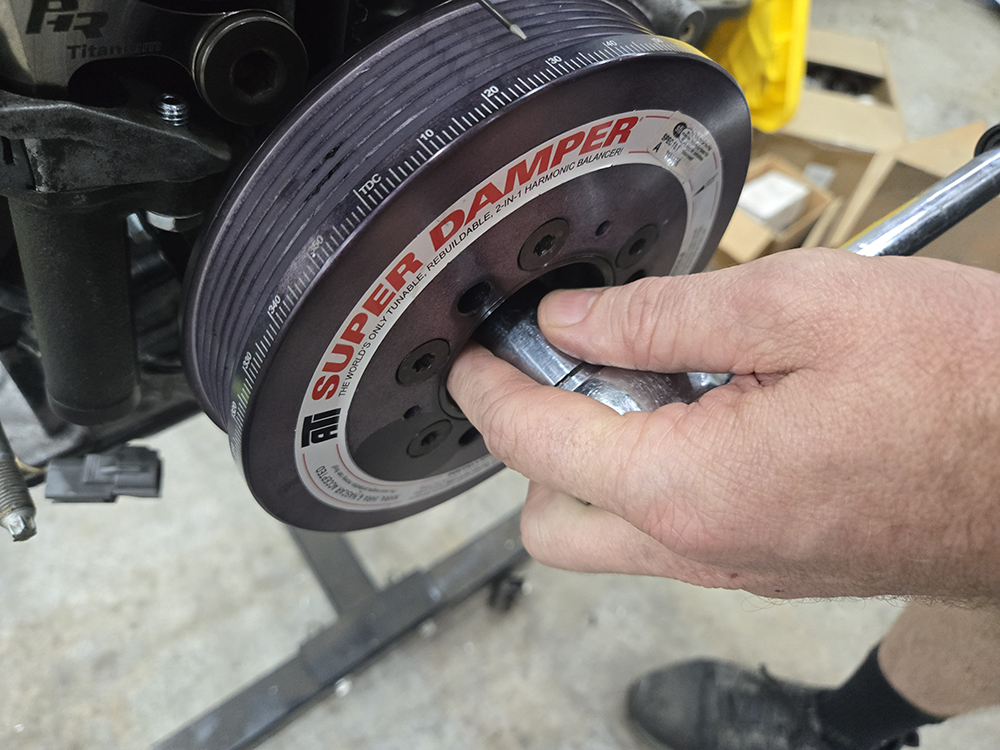
Remove the crankshaft dampener (harmonic balancer) to ease installation. Install the Timing Belt Tensioner Stud and the low-profile socket head M8 Bolt into the front cover. The low-profile bolts are necessary for clearance of the new tensioner pulley bolt and nut. For the stud, it is recommended to use some medium strength thread locker.
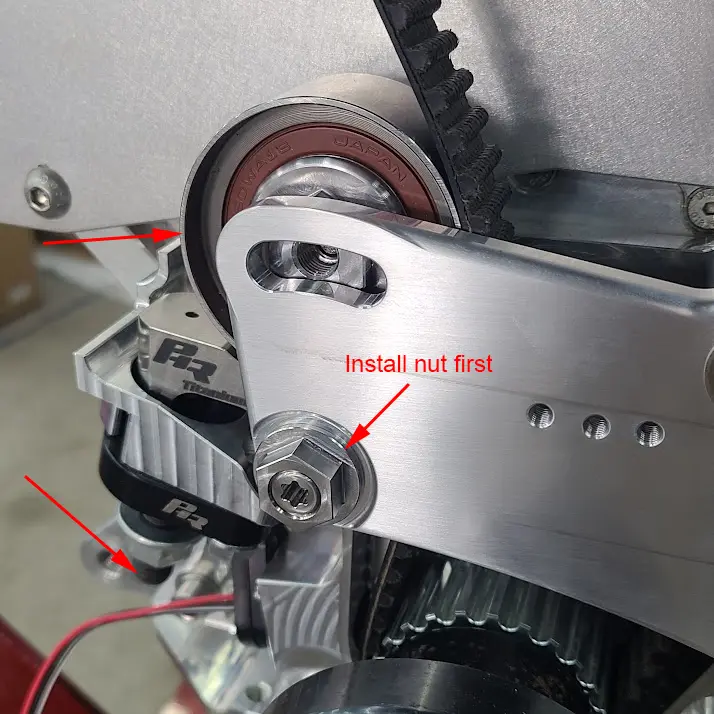
Step 2: Install new pulley bolt
Remove the bolt securing the pulley to your timing belt tensioner bracket. Install the new pulley bolt. The stock nut will be used on the back side of the pulley. We don't provide this nut.
Note: The PHR timing belt tensioner bracket hole is a can be a very tight fit. If you struggle to push the new bolt through the bracket, just drill it or ream it out a little with a 5/16", or number "O" drill bit .
Step 3: Install Tensioner
Install the timing belt tensioner bracket and pulley assembly onto the stud.
Step 4: Optional Secondary Idler
If using a secondary idler pulley, bolt it to the "Full Send" Bracket. Also slide the 80mm long M8 Socket Head Bolts and Washers into the bracket.
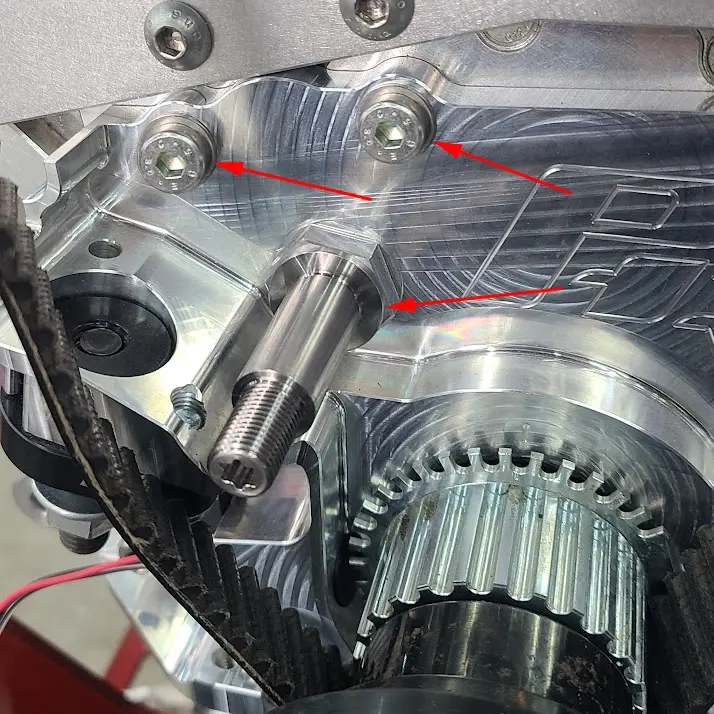
Step 5: Set Timing, Install Bracket
Align the timing belt according to mechanical timing marks, but refrain from adjusting the belt tension at this stage . You will need to remove the 3 bolts in the front cover (or oil pump) where the new bolts will go for the support bracket. After setting the mechanical timing, install the "Full Send" Timing Support Bracket. Tighten all three M8 Bolts.
Step 6: Tighten nut, set belt tension
Install and tighten the nut onto the tensioner bracket stud. You can now set the belt tension. It is preferred to use a manual tensioner. Set your belt tension using the manual tensioner to your desired belt tension. After setting belt tension, rotate motor several full rotations and recheck belt tension and timing.
Step 7: Lock it down
If belt tension and timing is satisfactory, lock the pulley to the bracket using the M10 bolt and washer.
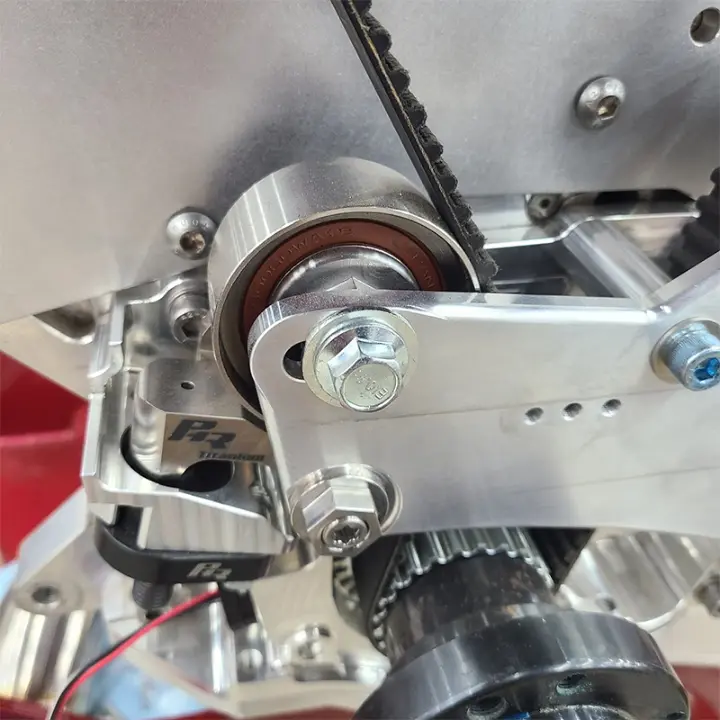
Step 8: Install Timing Pointer
Bolt on the timing pointer to the bracket. Reinstall the crankshaft dampener (harmonic balancer). Set the timing pointer in the proper position. (See further instruction on finding TDC below)
Finding True Top Dead Center (TDC) on a 2JZ Engine Without Timing Marks
Since there are no existing reference marks, you’ll need to use the piston stop method to find true TDC. This involves stopping the piston before and after TDC, then marking the midpoint.
Tools Required:
- TDC indicator (solid stop tool or dial indicator with extension)
- Ratchet and breaker bar
- 22mm socket (for crankshaft bolt)
- White paint marker or scribe
- Degree wheel (optional but helpful)
Step 1: Remove Spark Plug from Cylinder #1
- Ensure the engine is cool before working.
- Remove the spark plug for cylinder #1 (front-most cylinder).
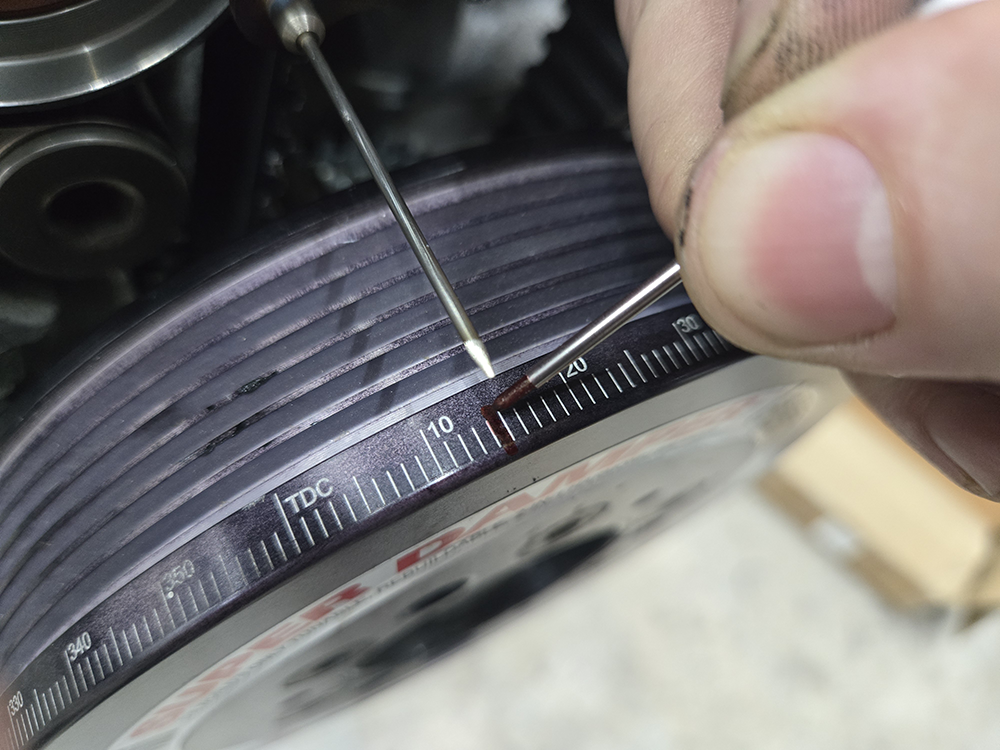
- Rotate the engine clockwise (using a ratchet and 22mm socket on the crankshaft bolt) until the piston not near TDC. You want to make sure you have clearance for installing the piston stop tool.
Step 2: Install a Piston Stop Tool
- Insert a solid stop tool into the spark plug hole.
- If using a homemade tool, ensure it’s long enough to stop the piston but short enough to avoid damage.
- Slowly rotate the crankshaft clockwise until the piston contacts the stop.
- Looking at the timing pointer, note the number of degrees away from the TDC mark this position is.
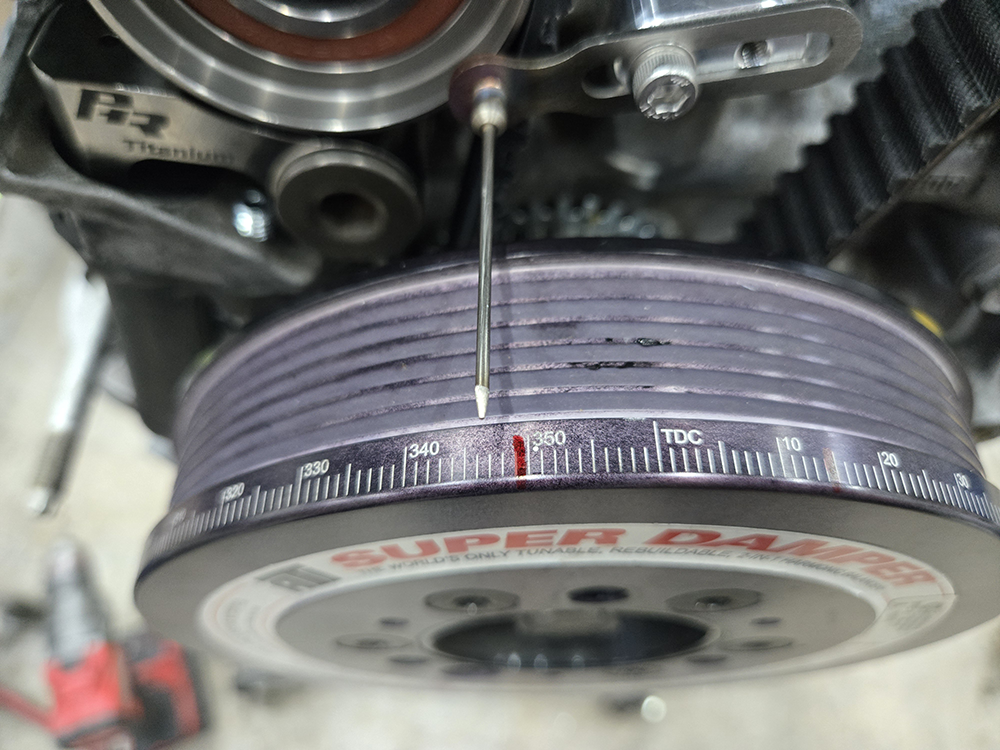
Step 3: Rotate the Engine in the Opposite Direction
- Using the ratchet, rotate the crankshaft counterclockwise until the piston contacts the stop once more.
- Again, looking at the timing pointer, note the number of degrees away from the TDC mark this position is.
Step 4: Find True TDC
- If both marks are the same number of degrees away from TDC, the timing pointer is aligned with TDC.
- If the distances differ, adjust the timing pointer accordingly.
- Recheck using steps 2 and 3 again.

Alternative Method: Dial Indicator
If a piston stop tool is unavailable, you can:
- Insert a dial indicator with an extension into the spark plug hole.
- Slowly rotate the crankshaft until the piston reaches its highest point.
- Note when the indicator starts moving down again—this is approximate TDC.
- For precision, use the piston stop method to confirm.
Your engine's True TDC is now accurately found! 🔧🔥
You are now finished with the installation!