When you’re running a dedicated race engine without the factory front timing cover, accurate ignition timing becomes a manual job—and PHR has your solution. The PHR Adjustable Timing Pointer is designed specifically for 2JZ engines in motorsports applications, where the stock timing reference is no longer usable. Precision-machined from billet aluminum, this bracket and pointer setup allows you to set your timing reference exactly where you need it
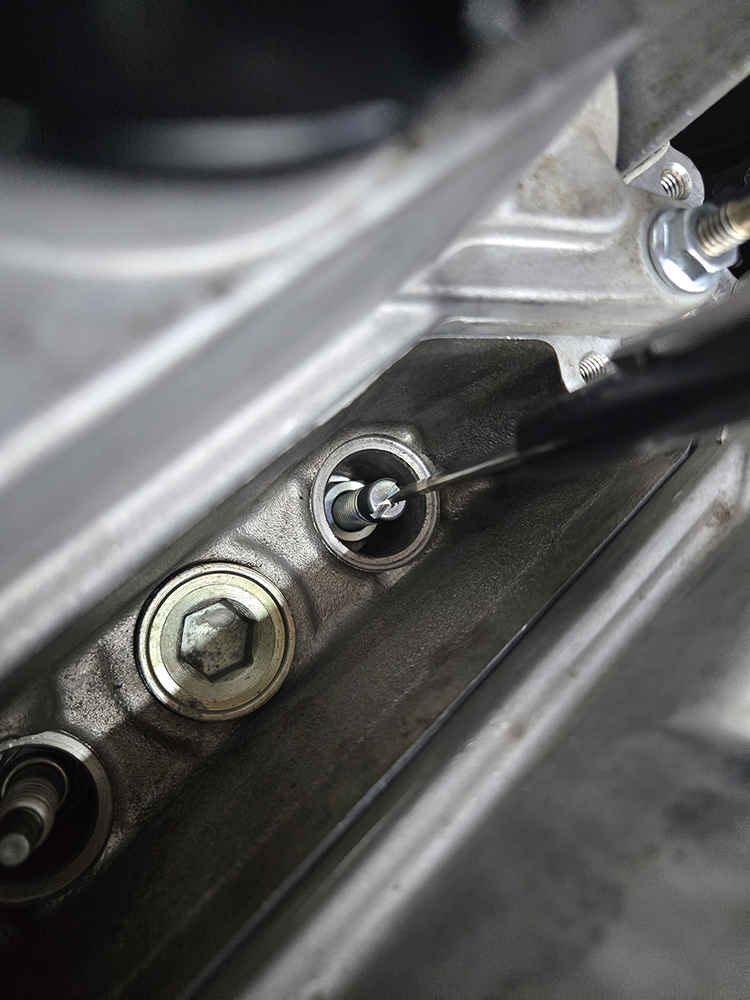
Step 1: Remove Bolt from Oil Pump
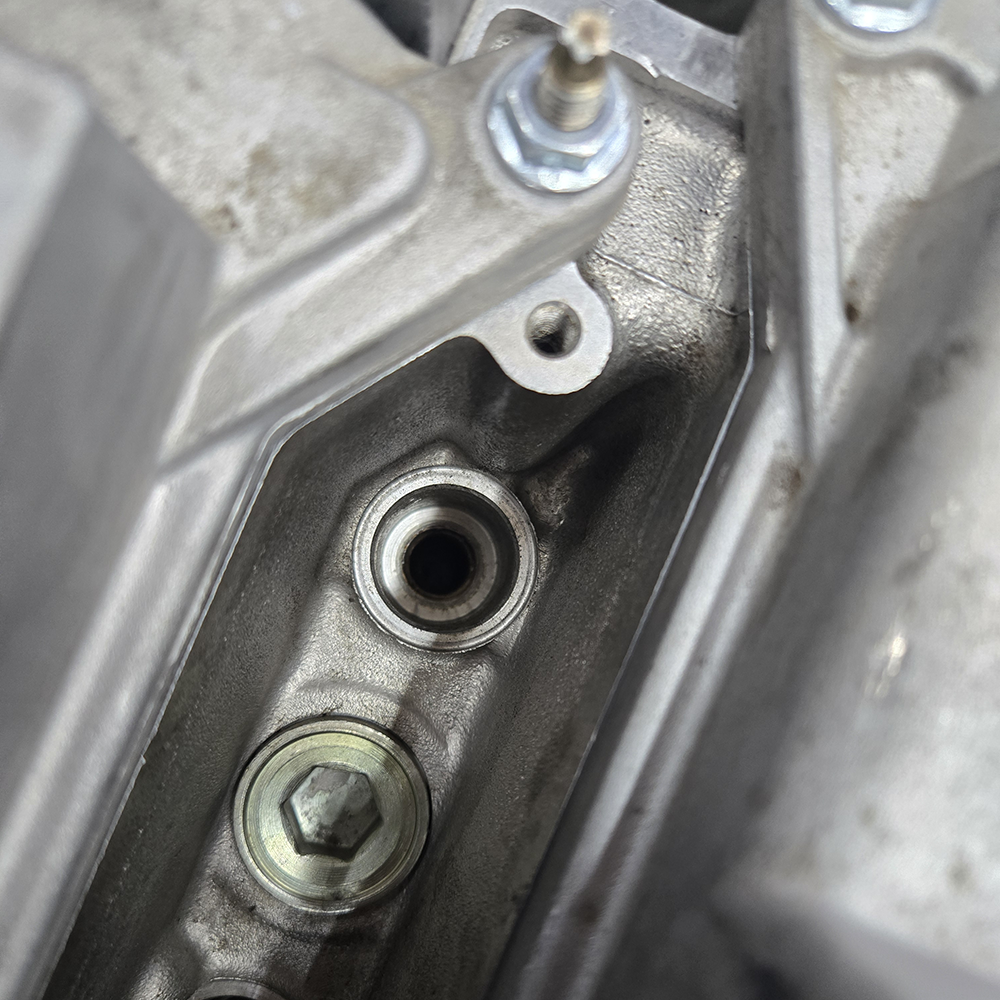
Remove the bolt from the oil pump as shown in the picture. This will be the bolt hole for the timing pointer.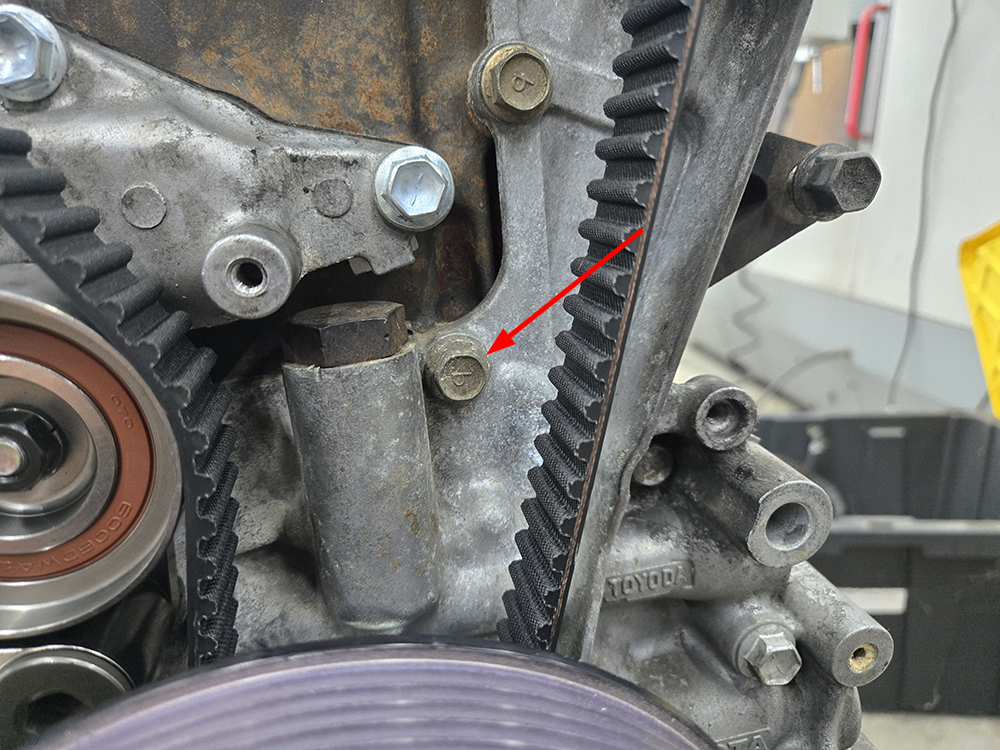
Step 2: Install the timing pointer
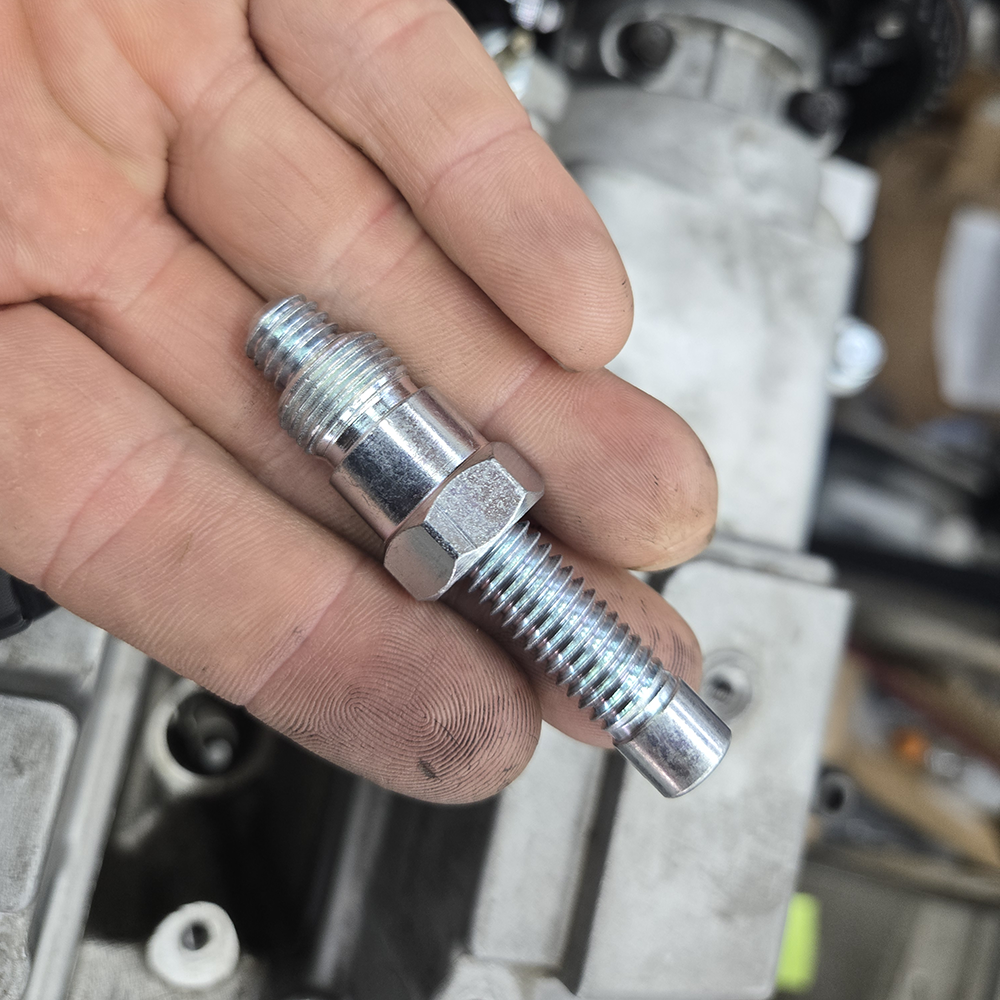
Using the bolt that came with the timing pointer, bolt the timing pointer into the oil pump and make the needle around an 1/8 inch from your damper.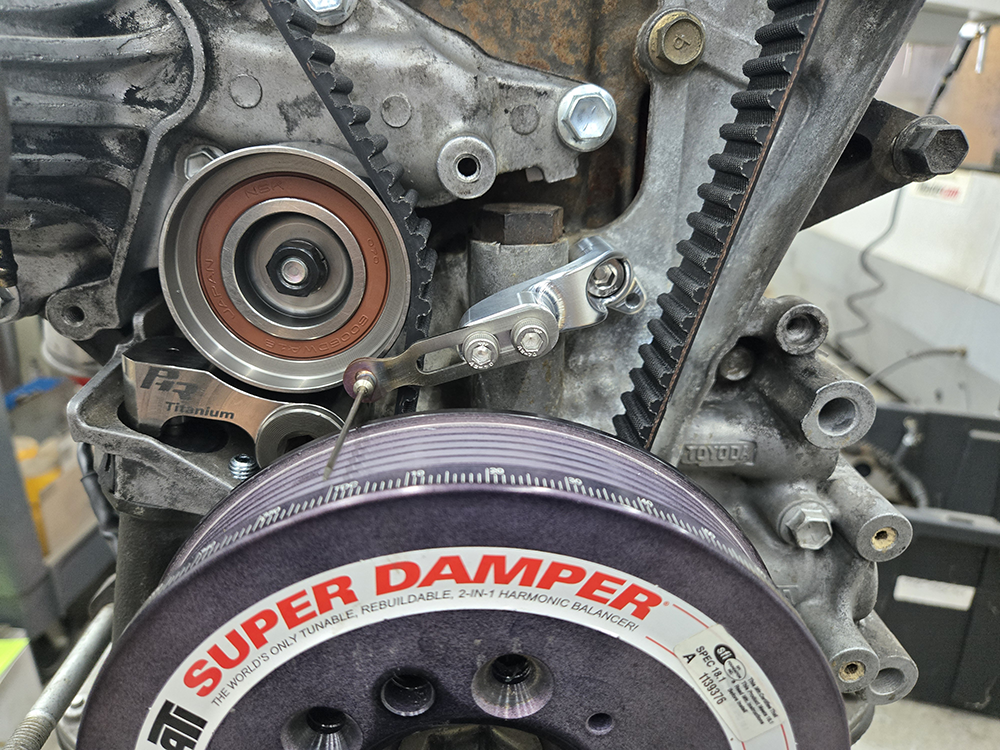
Step 3: Mark the drill hole
Using an extended tip marker like the one in the picture, mark out the place to drill a dowel hole.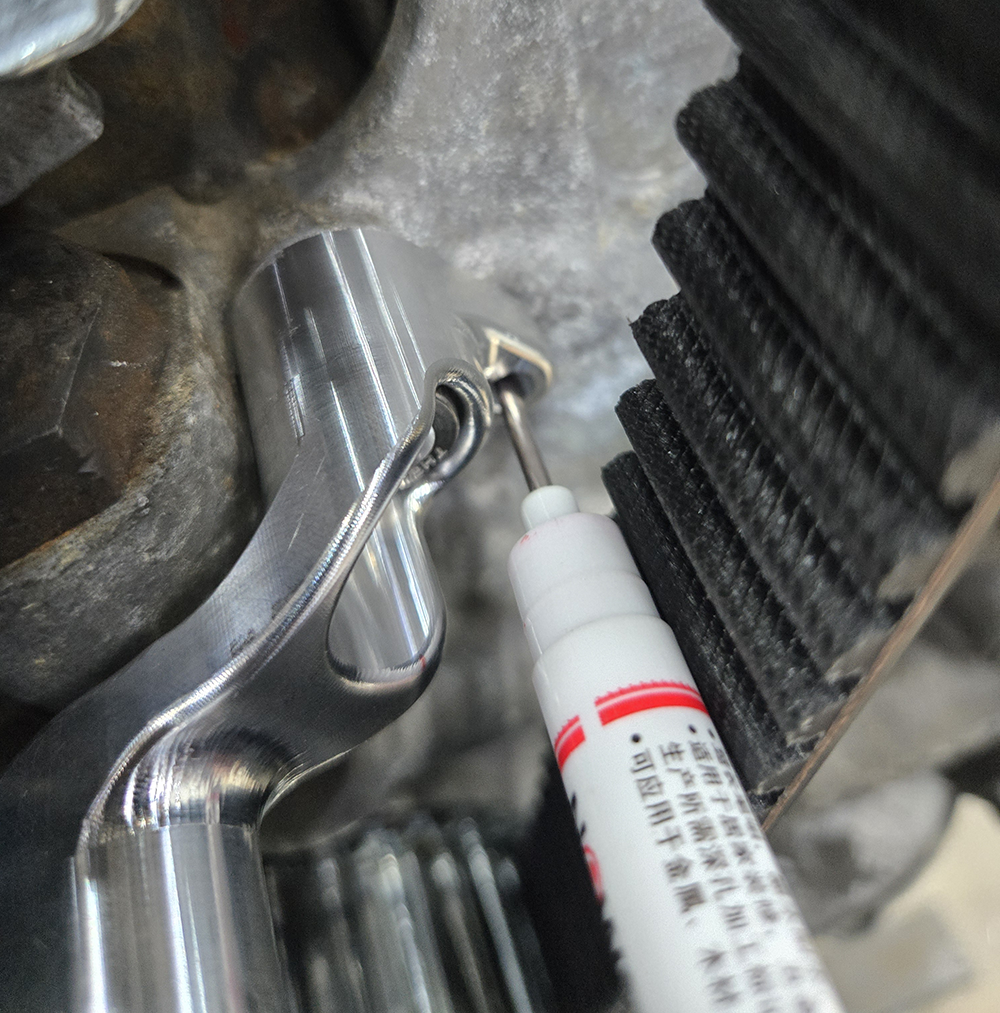
Step 4: Drill out the dowel hole
Using around a 3/16 drill bit, drill out the dowel hole where you marked before,
Note for use of factory oil pump: The oil pump or front cover is pretty shallow, and behind it in the drill location shown is the crank case. So be careful to not drill completely through the oil pump. You should keep the hole as shallow as possible, with just enough depth that the oil pump dowel will align and stop rotation. If you happen to go through the oil pump, see instructions below.
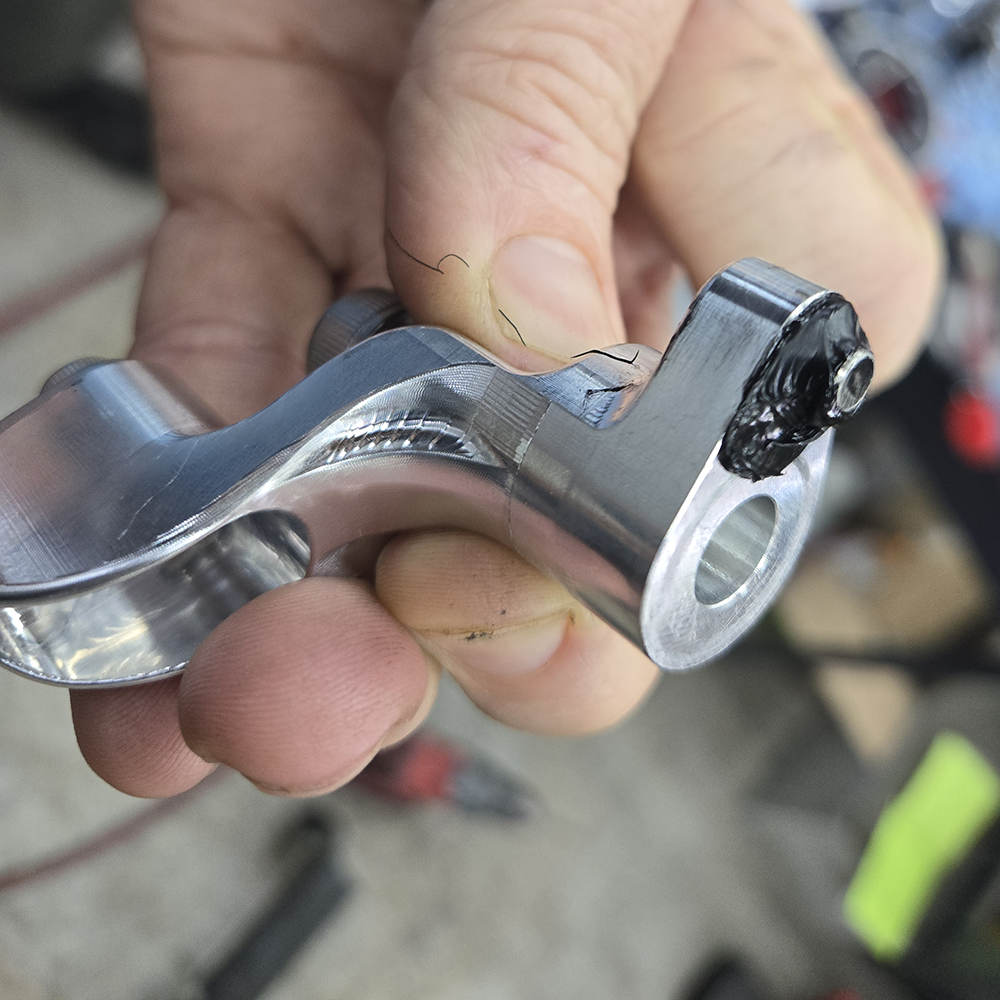
Step 5: Press the dowel into the timing pointer.
Using a press, vice, etc. press the dowel into the timing pointer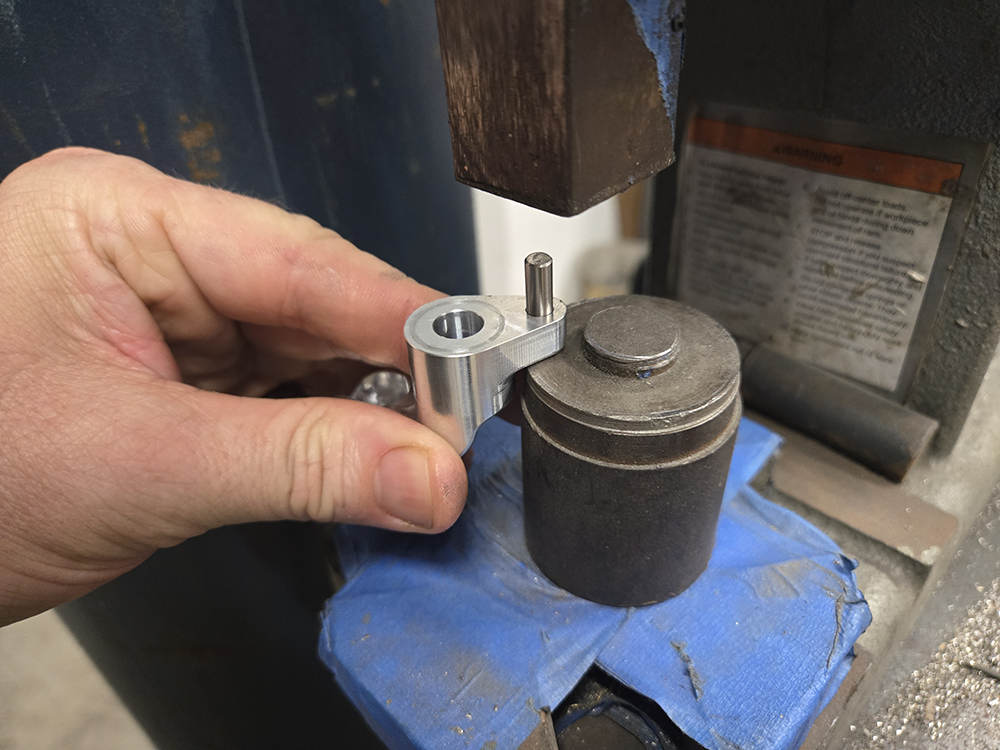
The dowel should stick out just enough to enter the drill hole and allow the bracket to be bolted down flat. Be sure to double check how deep you press the dowel with how if fits into the drill hole. Adjust as necessary.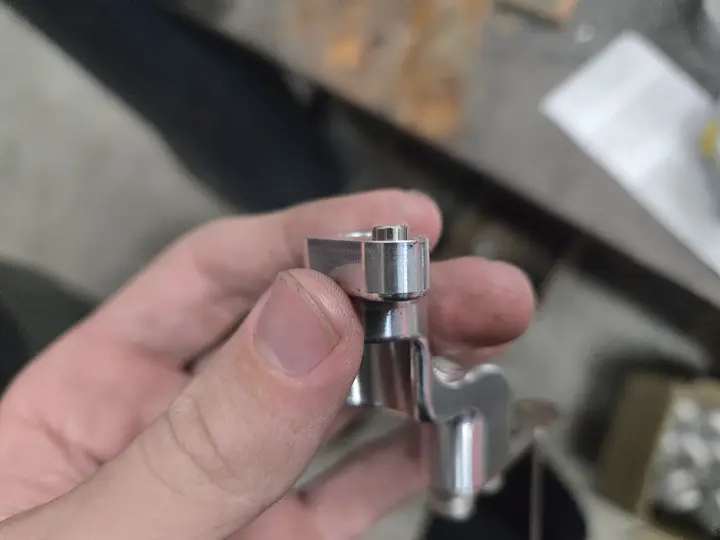
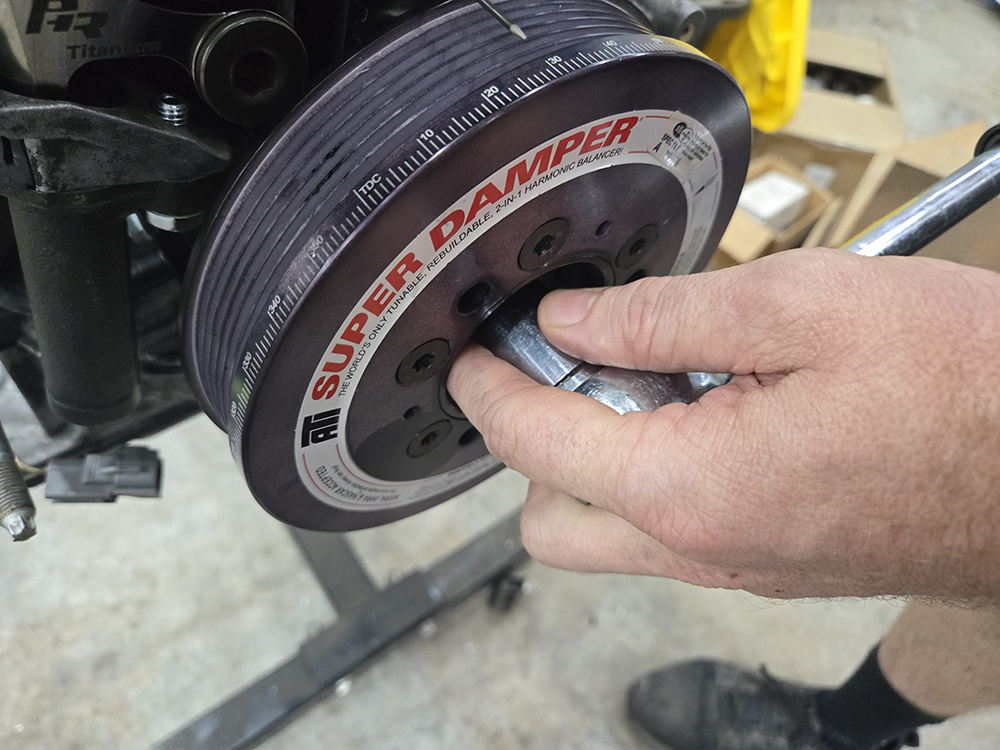
Step 6: Install the timing pointer
This time with the dowel, bolt in the timing pointer and align the dowel to go in the hole.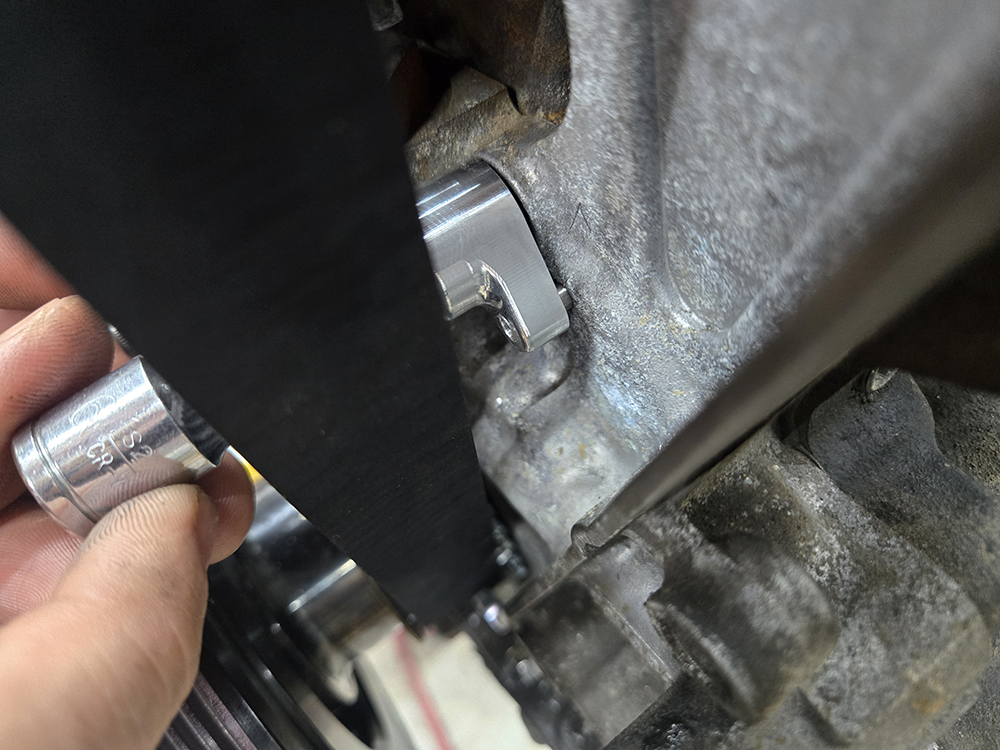
HELP: IF YOU HAPPEN TO DRILL THROUGH THE OIL PUMP OR FRONT COVER
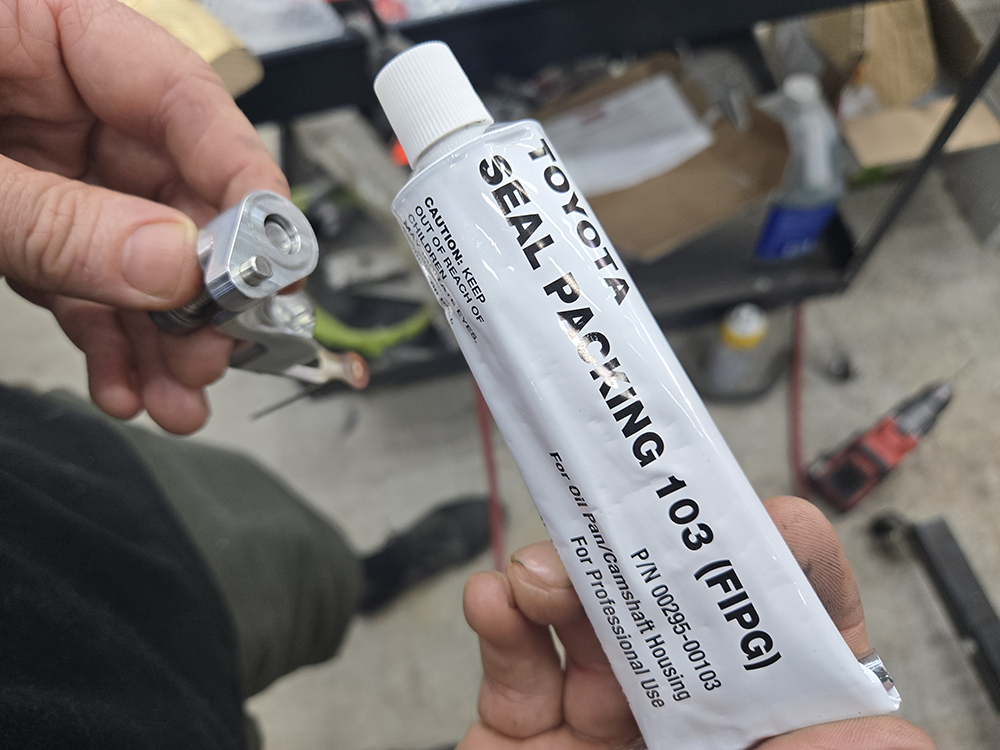
Using FIPG Black, put sealand around the dowel to make sure no oil leaks out of the hole, use the pictures as reference. after you apply the FIPG, install as step above says. 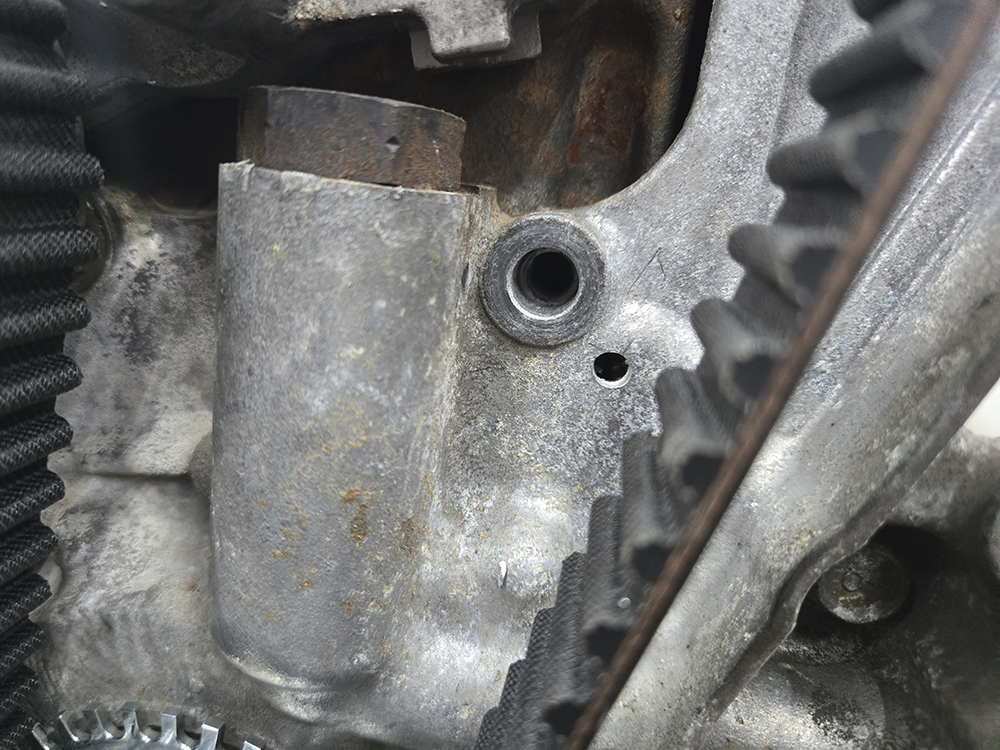
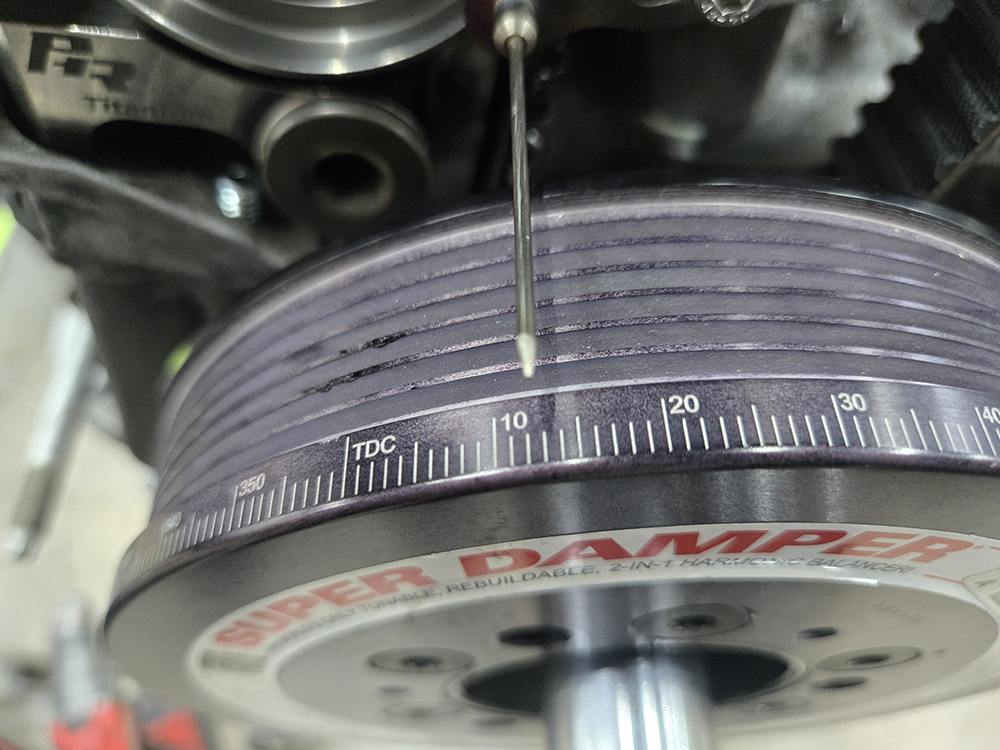
Finding True Top Dead Center (TDC) on a 2JZ Engine Without Timing Marks
Since there are no existing reference marks, you’ll need to use the piston stop method to find true TDC. This involves stopping the piston before and after TDC, then marking the midpoint.
Tools Required:
- Piston Stop
- Ratchet and breaker bar
- 22mm socket (for crankshaft bolt)
- White paint marker or scribe
- Degree wheel (optional but helpful)
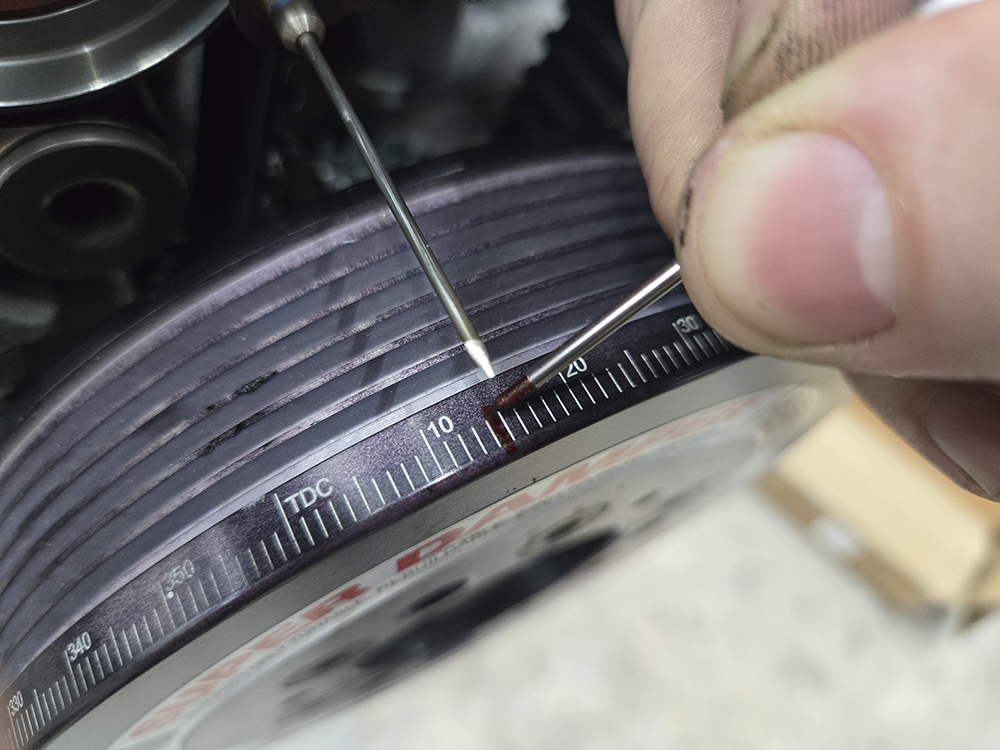
Step 1: Remove Spark Plug from Cylinder #1
- Ensure the engine is cool before working.
- Remove the spark plug for cylinder #1 (front-most cylinder).
- Rotate the engine clockwise (using a ratchet and 22mm socket on the crankshaft bolt) until the piston not near TDC. You want to make sure you have clearance for installing the piston stop tool.
Step 2: Install a Piston Stop Tool
- Insert a solid stop tool into the spark plug hole.
- If using a homemade tool, ensure it’s long enough to stop the piston but short enough to avoid damage.
- Slowly rotate the crankshaft clockwise until the piston contacts the stop.
- Looking at the timing pointer, note the number of degrees away from the TDC mark this position is.
Step 3: Rotate the Engine in the Opposite Direction
- Using the ratchet, rotate the crankshaft counterclockwise until the piston contacts the stop once more.
- Again, looking at the timing pointer, note the number of degrees away from the TDC mark this position is.
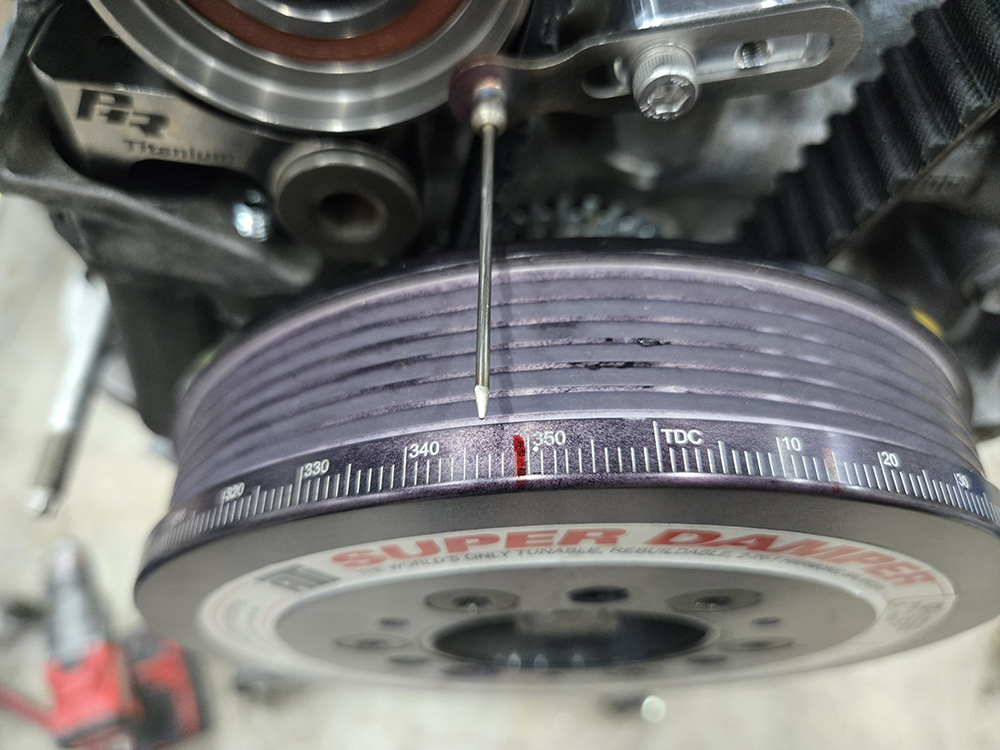
Step 4: Find True TDC
- If both marks are the same number of degrees away from TDC, the timing pointer is aligned with TDC.
- If the distances differ, adjust the timing pointer accordingly.
- Recheck using steps 2 and 3 again